Author Archive

Hydroponics: Growing an Appreciation for Plants

Tuesday, August 9th, 2022

I once heard a saying – “Don’t feel pity on plants because they can’t move. Feel pity on us, because we have to”. I really didn’t have an appreciation for what this meant until the COVID pandemic hit, which restricted my movement for a couple of years, and I decided to spend some of my new-found time at home learning how to raise plants in my little flat in central Singapore. The result is a small hydroponics system that now lines the sunny windows of my place, yielding fresh herbs weekly that I incorporate into my dishes.

For me, hydroponics really drove home how remarkable plants are: from a bin containing nothing but water and salts, a fully-formed plant emerges. No vitamins, amino acids, or other nutrients – just add sunlight, and the plant produces everything it needs starting from a single, tiny seed. The seed encodes every gene it needs to survive and reproduce – our basil plant, for example, is tetraploid, which means it has four copies of every gene. Perhaps this somewhat explains the adaptability of plant clones – it is almost as if every branch on our basil bush has a separate character, each one trying a different angle at survival. Some branches would grow large and leafy, others small and dense, and if you propagate by a cutting, the resulting plant would inherit the character of the cutting. Thus, a lone plant should not be mistaken as lonely: it needs not a mate to create diverse offspring. Every tetraploid cell contains the genetic diversity of two diploids (whereas a human is one diploid), allowing it to adapt without need of sex or seedlings.

I also did an experiment and grew some sage from seed, and planted one set in dirt and another in hydroponics. Even though from the same seed stock, the resulting individuals bore little resemblance to each other. The dirt-grown sage looked much like the herb you’re familiar with in the grocery store – dark green, covered with fine hair, and densely arranged on a stem. The hydroponically grown sage instead grows like a vine, with long thin green stems between each leaf, the leaves themselves having a lighter color and less hair. The flavor is even a bit different; the hydroponic sage emits a slightly sulfurous odor when disturbed, and exhibits a bit more mint on the palate when eaten.

Even more fascinating is how the plants seem to “groom the water”. I’ve noticed that the most successful plants we’ve tried to grow can lower the pH of the water on their own, and regulate it within a fairly consistent band (more on this later!). Furthermore, they seem to have recruited commensurate organisms to live among their roots. The basil grows long white or translucent roots with a pale white mycorrhiza, while the sage has a brownish symbiont and a short, bushy root ball. Thus I only fully replace the water of the hydroponic system as a last resort if a plant seems diseased; normally I will cycle the water by removing about a half of the reservoir and topping it up, so as not to displace the favored microbes from the ecosystem.

The Setup

The initial inspiration to try hydroponics actually came a bit by chance. We bought some locally grown hydroponic lettuce, and noticed that they were packaged as whole plants, complete with roots. We were curious – could we pluck most of the leaves of this lettuce, and then stick the plants in water, and grow another serving of hydroponic lettuce?

Surprisingly enough, it worked! Even with a crude setup consisting of a handful of generic plant fertilizer and a small aquarium bubbler, we were able to take a single plant and grow a couple more servings of lettuce from it. Unfortunately, with time, the plants started to grow very “stemmy” and pale, and eventually they succumbed to tiny mites that infested their leaves.

Inspired by this initial success, I started to read up a bit on how others did hydroponics. One of the top hits is a blog by Kyle Gabriel, detailing how he built an extremely sophisticated system based around a Raspberry Pi, and a multitude of sensors, valves and pumps. It was sort of a nerd’s dream of how farming could be fully automated. I figured I’m pretty handy with a soldering iron, so maybe I could give a go at building a system like his. So, I dug up a spare Raspberry Pi, some solid state relays and white LEDs left over from when I did the house lighting, and put together a simple system that just automated the lighting and took hourly photos of the plants as they grew. The time-lapses were fascinating!

You can’t really watch a plant grow in real time, but, over a period of days one can easily see patterns in how plants grow and adapt.

With this small success, I put my mind toward further automation – adding various pumps and regulators for the system. However, as I started to put together the BOM for this, I realized very quickly that there was going to be no return on investment for building out a system this complicated. Plus, I really didn’t like that the whole system ran on code – I did not relish the idea of coming home to a room flooded with water or a set of rotten plants because my control program hit a segfault.

So, I sat back and thought about things a bit. First, one observation I had was despite providing the plants with a 10,000 lux light source 12 hours a day, they still had a tendency to grow toward the nearby window. As an experiment, I took one bin and removed it from the regulated light source, and just stuck it up against the window. The plant grew much better with natural sunlight, so, I removed all the artificial lighting, unplugged the Raspberry Pi, and just stuck all the plants against the windowsill (it definitely helps that I live one degree off the equator – it’s eternally summer here, with sunrise at 7AM and sunset at 7PM, 365 days a year). I was happy to save the electricity while getting bigger plants in the process.

For water level automation, I replaced the computer with two float switches in series. One switch cuts off the pump if the water level gets too low in the feed reservoir; the other cuts off the pump if the water level gets too high in the plant’s growth bin. You can use the same type of switch for both purposes; by just mounting the switch upsidedown you can invert the function of the switch.

The current “automated” system, consisting of a reservoir on the left, with a peristaltic pump on top of the reservoir bin, and two float switches. The silicone tube that takes the solution from the reservoir to the plant bin is covered by an old sock to prevent algae from growing in the solution when it’s not moving. There is also an aeration pump, not visible in this photo.

The float switch mounted on the top, functioning as a “break-when-full” switch. You can see the plant’s roots have taken over the entire bin! A couple of spacers were also added to adjust the height of the water.

The float switch mounted on the bottom of a tank, functioning as a “break when empty” switch. In order to provide clearance for the switch on the bottom, a couple of wine corks were hot-glued to the bottom of the bin. The switch comes with a rubber o-ring, creating an effective seal and no leakage.

So, with a couple of storage bins from Daiso, two float switches and a peristaltic pump, I’ve constructed a system that automates the care of our plants for up to two weeks at a time for under $40. No transistors required – just old-school technology dating from the 1800’s!

There is one other small detail necessary for hydroponics – an aeration pump. Any aquarium pump will do – although we eventually upgraded to some fancy silent pumps instead of the cheaper but noisier diaphragm based ones. Some blogs say that the “roots need oxygen” to survive, but my suspicion is actually that the pumps mostly serve to circulate the nutrient solution. If you leave the pump off, the roots will rapidly deplete the water around them of nutrients, and without any circulation you’re relying purely on a slow process of diffusion for nutrients to reach the roots. I’ve noticed that on bins with a low air flow, the roots will grow thick and matted, but bins with a faster air flow, the roots barely need to grow at all – my hypothesis is this reflects the plant allocating less resources toward root growth in bins with greater circulation, because fresh solution is always available with faster circulation.

The Tricky Bit

The electronics were actually the easiest part of the whole enterprise; the hardest part was figuring out what, exactly, I had to add to the water to get the plants to flourish. Once I got this right, the plants basically take care of themselves; of course it helps to pick plant varietals that are pest-resistant, and have the innate ability to regulate the pH level around their roots.

When I started, I was naively aware that plants needed nitrogen-bearing fertilizers. Reading the label on packaged fertilizer solutions, they use an “NPK” system, which stands for nitrogen-phosphorous-potassium. OK, sure, so plants need a bit more than just nitrogen. Surely I could just pick up some of this NPK stuff, dissolve it in some water, and we’re good to go…

…but how much of this should I add? This deceptively simple question lead me down a several-month rat-hole that took many failed experiments and daily journals of observations to find an answer. The core problem is that most plant bloggers like to use units like “one handful” as a unit of measure; the more precise ones would write something to the effect of “one capful per gallon”. As an engineer, units of handfuls and capfuls are extremely dissatisfying: how many grams per liter, dammit!

This lead me to research several academic papers about plant nutrition, which lead to reading graphs about plant growth under “controlled” conditions that lead to astonishingly contradictory results to what the plant bloggers would write: the NPK ratios implied by some of the academic works were wildly different from what the plant bloggers relayed in their actual experience.

It turns out the truth is somewhere in between. A big confounding factor is probably the nature of the soil used in the research, versus the base quality of the water used in your hydroponic system. Most of the research I uncovered was written about fertilizing plants grown in soil, and for example “loamy diatomaceous earth” turns out to be quite a complicated mix of nutrients in and of itself.

The most informative bit of research that I uncovered was experiments done where they would ash a plant after it was grown and measure out all the base elements from the resulting dry weight of the plant. It was here that I learned that, for example, molybdenum is absolutely essential to the growth of plants. It’s almost never mentioned in soil cultures, because dirt almost always has sufficient trace quantities of molybdenum to sustain plants, but water cultures quickly become molybdenum-deficient, and the plants will become pale and sickly without a supplement.

I also learned that plants need calcium and magnesium in astonishingly large quantities; as much as they need phosphorous and potassium. Again, these two nutrients are less discussed in soil-based literature because many rocks are basically made of calcium and magnesium, and as such plants have no trouble extracting what they need from the soil.

Finally, there is the issue of iron. Iron turns out to be the hardest nutrient to balance in a hydroponic system. Despite being extremely plentiful on Earth, and indeed, possibly being the penultimate composition of the entire universe, it is extremely scarce as a free atom in the biosphere. This is in part because it gets strongly bound to other molecules. For example, oxygen binds to myoglobin with a log K1 of 6.18, which means that it is a million times more likely to find oxygen bound to myoglobin than unbound in solution. This may sound strong, but EDTA, a chelating agent, has a log K1 of something like 27.7, so it is one octillion (1,000,000,000,000,000,000,000,000,000) times more likely to exist as bound to iron than unbound in equilibrium. In a way, iron is so biologically important that organic life had an arms race to bind free iron, and some ridiculously potent molecules exist to rapidly sweep the tiniest amount of iron out of solution. Fortunately, as long as I (or more conveniently, the plant itself) can keep the pH of the water below 5.5, I can take advantage of the extremely strong binding of EDTA to iron to keep it dissolved in solution and out of reach of other organisms trying to scavenge it out of the water. The plants can somehow take in the bound iron-EDTA complex, degrade the EDTA and extract the iron for its use (this took a long time and many trials with various iron binding agents to figure out how to remedy the chlorosis that would eventually take over every plant I grew).

Alright, now that I have a vague understanding of the atoms that a plant needs to survive, the question is how do I get them to the plant – and in what ratios? The answer to this is equally as vague and frustrating. You can’t simply throw a chunk of magnesium metal into a bin of water and expect a plant to access it. The magnesium needs to be turned into a salt so that it can readily dissolve into the water. One of the easiest versions of this to buy is magnesium sulfate, MgSO4, also known as epsom salts. So, I can just read the blogs and find the ones that tell you how many grams of magnesium sulfate to add per liter of water and be done with it, right?

Wrong again! It turns out that MgSO4 has several “hydration states” (11 total). Even though it looks like a hard, translucent crystal, Epsom salt is actually more water than magnesium by weight, as 7 molecules of water are bound to every molecule of magnesium sulfate in that preparation.

Of course, no plant blogger ever specifies the hydration states of the salts that they use in their preparations; and many on-line listings for agricultural-grade salts also fail to list the exact hydration state of their salts. Unfortunately this means there can be extremely large deviations in actual nutrient availability if you purchase a dissimilar hydration state from that used by the plant blogger.

That left me with purchasing a set of salts and trying to calculate, from first principles, the ratios that I needed to add to my hydroponics bins. The salts I finally decided on purchasing are:

  • Monopotassium phosphate (anhydrous) K2PO4
  • Potassium sulfate (anhydrous) K2SO4
  • Calcium nitrate Ca(NO3)2•4H2O – hygroscopic
  • Magnesium sulfate MgSO4•7H2O

Plus a pre-mixed micronutrient from a local hydroponics shop that contains the remaining essential elements in the following ratios:

  • Iron as EDTA chelate 21.25 mg/mL
  • Manganese 5.684 mg/mL
  • Boron 0.483 mg/mL
  • Zinc 0.617 mg/mL
  • Copper 0.267 mg/mL
  • Molybdenum 0.471 mg/mL

For the salts, I computed a matrix that allows me to solve for the amount of nutrient I want in solution, by taking the mass fraction of each nutrient available, writing it in matrix form, and then inverting it (had to crack open my linear algebra book from high school to remember what determinants were! Who knew that determinants could be useful for farming…).

You can make the matrix yourself by expressing the ratio of the milligrams of nutrient (as derived by the atomic weight of the nutrient) per milligram of compound (as derived by summing up the weight of all the atoms in the molecular formula, including the hydration state), and putting it into a matrix form like this:

And then taking the coefficients into an inverse matrix calculator and deriving a final format that allows you to plug in your desired NPK ratio and compute the mass of the salts you need to dissolve in water to achieve that:

As a sanity check, I plug the calculated weights back into the forward matrix to make sure I didn’t mess up the math, and I also add up all the dissolved solids to a TDS (total dissolved salts) number, so I can cross-check the resulting solution easily using a cheap TDS meter (link without referral code). In case you want to start from a template, you can download the spreadsheet. The template contains the pre-computed ratio that I currently use for growing all my herbs with compounds that I can source easily from the local market, and it seems to work fairly well for plants ranging from brazilian spinach to basil to sage.

As a side note, calcium nitrate is pretty tricky to handle. It’s very hygroscopic, so if left in ambient humidity, it will absorb water from the atmosphere and “melt away” into a concentrated, syrupy liquid. I usually add a few percent extra by weight over the formula to compensate for the excess water it accumulates over time. Also, I store the substance in an air-tight bag, and I always wear nitrile gloves while handling the compound to avoid damaging my hands.

For the micronutrients, it’s a bit trickier to dose correctly. Fortunately, I have a micropipette set that can measure out solutions in the range from 1uL to 200uL, from back when I did some genetic engineering in my kitchen (pipettes are also surprisingly cheap (without referral code) now). Again, the blogs are not terribly helpful about dosing – you get advice along the lines of “one drop per bucket” or something like that. What’s a drop? What’s a bucket? The exact volume of a drop depends on the surface tension and viscosity of the liquid, but I went with the rule of thumb that one drop is 50uL (20 drops per mL) as a starting point.

Initially, I tried 60uL of micronutrients per 1.5L of solution, but the plants started to show evidence of boron poisoning (this is a great guide for diagnosing plant nutritional problems based on the appearance of the leaves), so after a few iterations and replacements of the water to flush out the excess accumulated micronutrients, I settled on 30uL of micronutrients per 1.5L of solution, with a 15uL per week bump for iron-hungry species like spinach.

At a microliters-per-week consumption rate, even the smallest bottle of 150mL micronutrient solution will last years, but the tricky part is storing it. In order to avoid contaminating the bottle, I aliquot the solution every couple months into a set of 1.5mL eppendorfs which I keep in my wine fridge, alongside the original bottle. Even though I try my best to avoid contaminating the eppendorfs, after a couple weeks a pellet forms at the bottom from some process that is causing the micronutrients to come out of solution, so I typically end up discarding the aliquot before it is entirely used up.

The Final Result

It’s pretty neat to go from a pile of salts to delicious herbs. About a gram of salts go in, and a week later a couple dozen grams of leaves come out!


In go salts…


Out comes basil!

Basil in particular has been a real champ at growing in our hydroponics bins – we are at the point now where between two plants, we’re regularly giving it away to friends because it yields more than we can eat, even though I cook Italian food almost every other night. A handful of basil, a bit of salt, olive oil, tomatoes and garlic and we have a flavorful bruschetta to kick off a meal! Our other favorite is sage, it’s great for flavoring pork and poultry, but it’s very hard to find for some reason in Singapore. So, having a bit of fresh sage around is convenient and saves us a bit of money since it can be quite expensive to buy in specialty stores.

It’s been less practical to grow bulk vegetables, such as spinach. Brazilian spinach has been fairly successful in terms of growth, but it takes about a month for a cutting to grow to maturity, and we need about four plants to make a salad, so we’d need several racks of bins to make a dent in our vegetable consumption. Also, in general our herbs have had less pests than leafy green vegetables; maybe their strong flavor comes from compounds they produce that also serves to repel bugs? So, in addition to being great flavor for our sauces, the herbs have required no pesticides.

Overall, it was satisfying to learn about plant biology while developing a better connection to my food through technology. It was also a calming way to pass time during the pandemic; agriculture requires patience and time, but the reward is visceral. Having kept a miniature farmer’s almanac to decode missing pieces of information from the blogosphere, I have an new appreciation for how such personal journals could lead to scientific discoveries. And, I’m a much better chef than I was a couple years ago. Somehow, just having the fresh herbs around inspired explorations into new and exciting pairings; it gave me a whole new way to think about food.

Name that Ware, July 2022

Sunday, July 31st, 2022

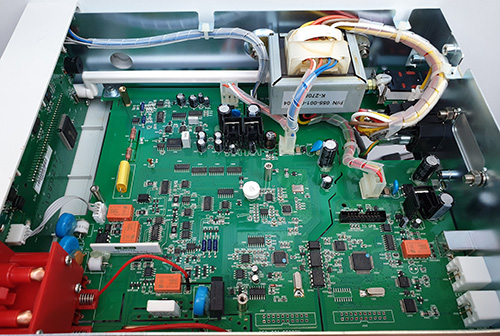
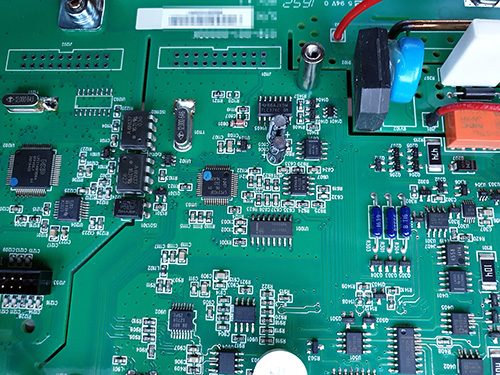
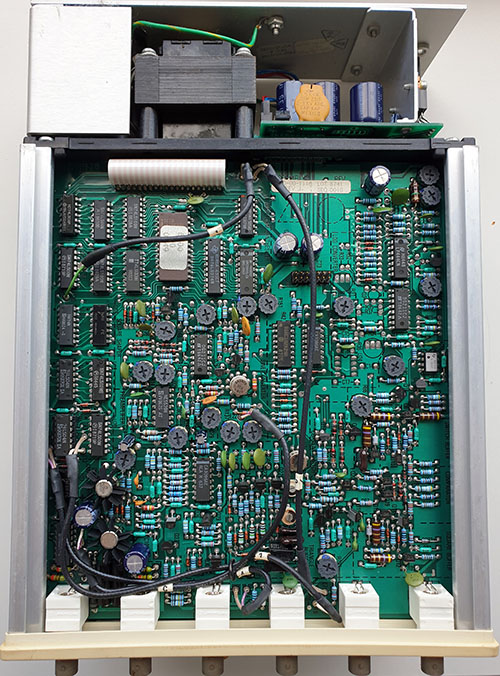
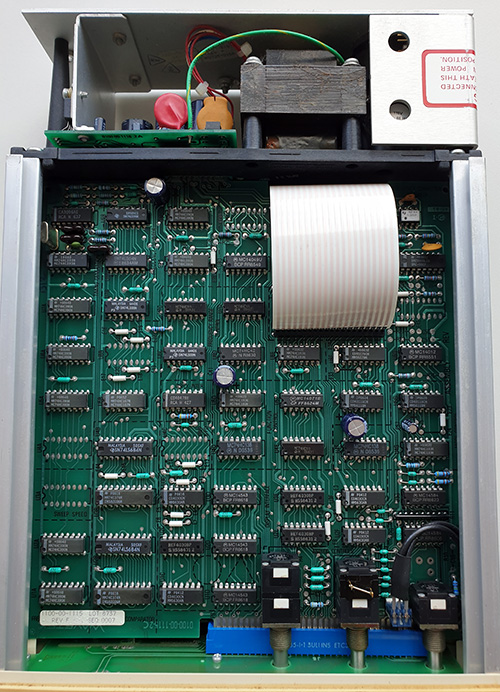
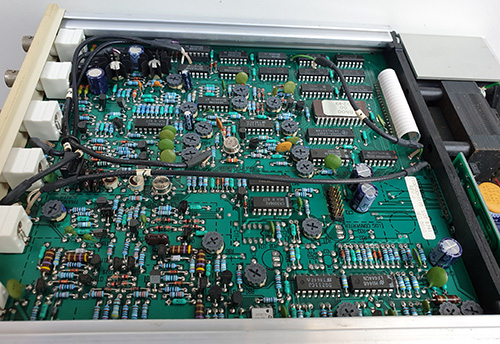
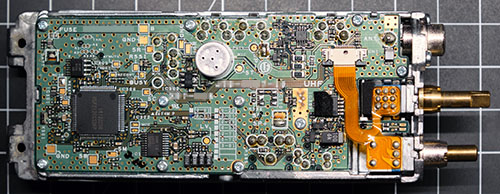
The Ware for July 2022 is shown below.

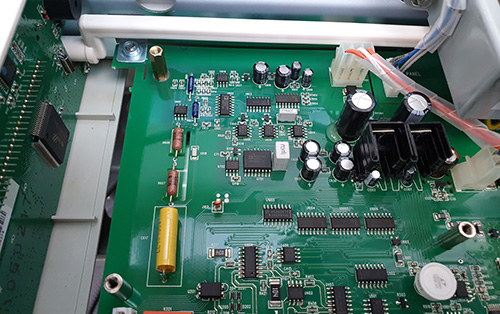
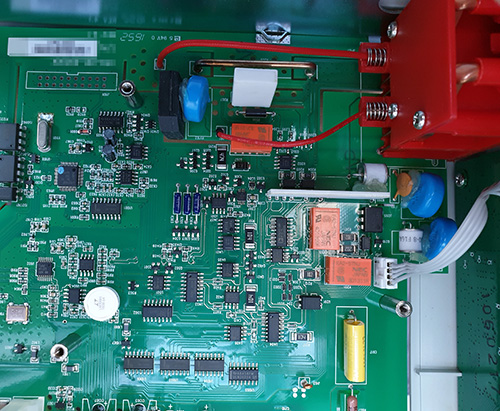
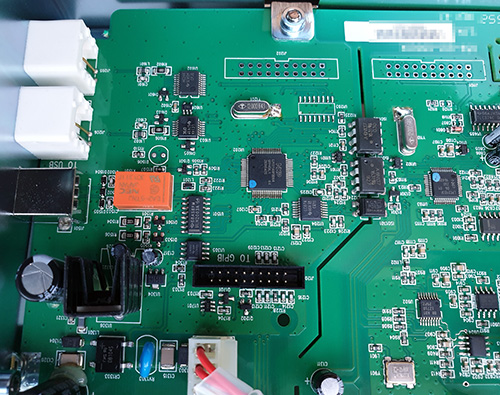
This is yet another fine ware contributed by jackw01. I kind of like how the board on the left went straight from bringup to production, without any attempt to strip out the debug headers or JTAG ports. Which is totally fine, btw: why change something that already meets spec, and might even be helpful with improving yields?…I just have to resist the urge to plug something into said ports.

Winner, Name that Ware June 2022

Sunday, July 31st, 2022

The Ware for June 2022 is a Cue COVID-19 test cartridge. Congrats to Nathan for identifying it first. Email me for your prize! Also thanks for the comment describing how it works, Frankie — that’s pretty fascinating. I’m copying your comment here so others who might have missed it can benefit from your insights:

The round object in the incubation chamber is a piezoelectric element designed to sonicate the sample solution. This ensures the contents of the lyophilized pellet (which contains the enzymes used for DNA amplification and detection) are well mixed with the sample solution. The PCB has heating elements which melt wax valves when it’s time to send the contents downstream. Lot of clever ideas in the Cue device.

I guess the blue stuff must be the wax valves. I was wondering what that was for. Also — wow, the black element is a mini sonicator. That is downright cool! Now I want to extract it from the plastic and hook it to a signal generator, heh.

The Plausibly Deniable DataBase (PDDB): It’s Real Now!

Thursday, July 28th, 2022

Earlier I described the Plausibly Deniable DataBase (PDDB). It’s a filesystem (like FAT or ext4), combined with plausibly deniable full disk encryption (similar to LUKS or VeraCrypt) in a “batteries included” fashion. Plausible deniability aims to make it difficult to prove “beyond a reasonable doubt” that additional secrets exist on the disk, even in the face of forensic evidence.

Since then, I’ve implemented, deployed, and documented the PDDB. Perhaps of most interest for the general reader is the extensive documentation now available in the Xous Book. Here you can find discussions about the core data structures, key derivations, native & std APIs, testing, backups, and issues affecting security and deniability.

Name that Ware, June 2022

Thursday, June 30th, 2022

The Ware for June 2022 is shown below.

Thanks to an anonymous benefactor for donating a few of these for this months’ Ware. The board itself is a bit sparse, but, there are some hefty clues regardless. I think there’s a good chance someone will guess it from this image alone. However, I’ve got a few other images in my back pocket in case it turns out to be too hard to guess. Either way, I’ll add them to this post once some guesses are in!

Because the board is so sparse, I thought maybe it would be fun to also dump the contents of the one chip that is on it. Not that it gives any particularly useful hint about what it does, but because it was fairly easy to do; just an SOIC test clip and a Raspberry Pi does the trick:

sudo i2cdump 1 0x50
I will probe file /dev/i2c-1, address 0x50, mode byte
(sample 1)
     0  1  2  3  4  5  6  7  8  9  a  b  c  d  e  f    0123456789abcdef
00: 00 00 94 4f 00 9e eb 2e c6 0d 12 bf ee 5b 49 2f    ..?O.??.?????[I/
10: 2e 9d 1e 34 f6 30 dd 1a 05 19 df 35 ab 74 df 75    .??4?0?????5?t?u
20: 06 bc 3d e4 f5 fe 7f 2d e6 8b 5b a2 0f 83 6b b5    ??=????-??[???k?
30: 04 7a 3a ae 68 96 5f f8 55 8a ce 3c 91 be 5b c3    ?z:?h?_?U??<??[?
40: e1 07 00 00 00 00 2e 00 0a 19 08 c9 d9 83 50 10    ??......??????P?
50: 13 20 a3 82 01 30 80 9a fd 92 06 3a 06 31 36 35    ? ???0?????:?165
60: 39 34 4a 12 11 9a 01 0e 08 02 15 00 80 88 c5 20    94J????????.???
70: 01 2d 00 00 c8 c3 00 00 00 00 00 00 00 00 00 00    ?-..??..........
80: 00 00 00 00 00 00 00 00 00 00 00 00 00 00 00 00    ................
****
f0: 00 00 00 00 00 00 00 00 00 00 00 00 00 00 00 00    ................

(sample 2)
     0  1  2  3  4  5  6  7  8  9  a  b  c  d  e  f    0123456789abcdef
00: 00 00 1c 44 fc 2b 6d 07 02 55 9a fe 0d ed 91 98    ..?D?+m??U??????
10: ab 6b 94 51 db bd 2f cb 93 cc e3 b8 e1 17 14 85    ?k?Q??/?????????
20: 9b 5e 0d fd 6b 18 c2 da 67 a6 73 98 99 cb f4 40    ?^??k???g?s????@
30: 3e ab 40 b4 48 eb aa c2 94 94 49 29 12 93 da 3e    >?@?H?????I)???>
40: f0 08 00 00 00 00 2e 00 0a 19 08 95 e2 83 50 10    ??......??????P?
50: 13 20 a3 82 01 30 80 9a fd 92 06 3a 06 31 36 35    ? ???0?????:?165
60: 39 34 4a 12 11 9a 01 0e 08 02 15 00 80 88 c5 20    94J????????.???
70: 01 2d 00 00 c8 c3 00 00 00 00 00 00 00 00 00 00    ?-..??..........
80: 00 00 00 00 00 00 00 00 00 00 00 00 00 00 00 00    ................
****
f0: 00 00 00 00 00 00 00 00 00 00 00 00 00 00 00 00    ................

It’s always instructive to dump a couple of samples. Without doing any numerical analysis, eyeballing the two dumps side-by-side makes me think whatever drives this is little-endian (given the formatting of some constants in address 0x40 and above), and the data from 0x04-0x40 is probably cryptographic in nature; assuming the implementation didn’t roll their own cipher, it’s probably either an AEAD, or an HMAC. I say this because the first 2-4 bytes from 0x00-0x04 are likely not ciphertext. However, the block size of AES is 16 bytes, so, it’s not any simple block-based encryption scheme, due to the odd 12 bytes or so that are present. However, the format could make sense if 12 bytes served as the nonce for AES-GCM-SIV, and then maybe the last 16 bytes are the authentication tag; that would yield 32 bytes of encrypted, authenticated data, which would be enough for…

…I’ll stop talking there, before I totally give it away!

Edit: looks like someone has already guessed what it is, so here’s some more photos of it!

The small bit of research I did on the device indicates it uses LAMP for amplification, so the device runs at an elevated but constant temperature, and the results are read out using an electrochemical method. Basically, the reagents are mixed with the sample, and they are pumped through a small channel (lined with some kind of blue film) that goes over gold-plated electrodes on the circuit board. The reaction presumably changes some sort of electrically measurable parameter as it evolves — conductivity, pH, impedance, something like that. I thought the round black object molded into the clear plastic assembly would be a heating element, but it also seems to be an electrode of some sort, as it measures an open circuit before the reagent mix is punctured, but has a high DC impedance once liquids are introduced to the chamber.

The I2C ROM likely encodes per-device calibration parameters, as well as (presumably encrypted and authenticated) traceability data such as expiration dates, serial numbers and the like. The encryption would enforce the expiration of the reagents (hence the disposal of the cartridges to yours truly), and also foil the ability of third parties to make interoperable cartridges.