Archive for the ‘Made in China’ Category

Preparing for Production of The Essential Guide To Electronics in Shenzhen

Sunday, March 13th, 2016

The crowd funding campaign for The Essential Guide to Electronics in Shenzhen is about to wrap up in a couple of days.

I’ve already started the process of preparing the printing factory for production. Last week, I made another visit to the facility, to discuss production forecasts, lead time and review the latest iteration of the book’s prototype. It’s getting pretty close. I’m now using a heavy, laminated cardstock for the tabbed section dividers to improve their durability. The improved tabs pushes up the cost of the book, and more significantly, pushes the shipping weight of the book over 16 oz, which means I’m now paying a higher rate for postage. However, this is mostly offset by the higher print volume, so I can mitigate the unexpected extra costs.

The printing factory has a lot of mesmerizing machines running on the floor, like this automatic cover binder for perfect-bound books:
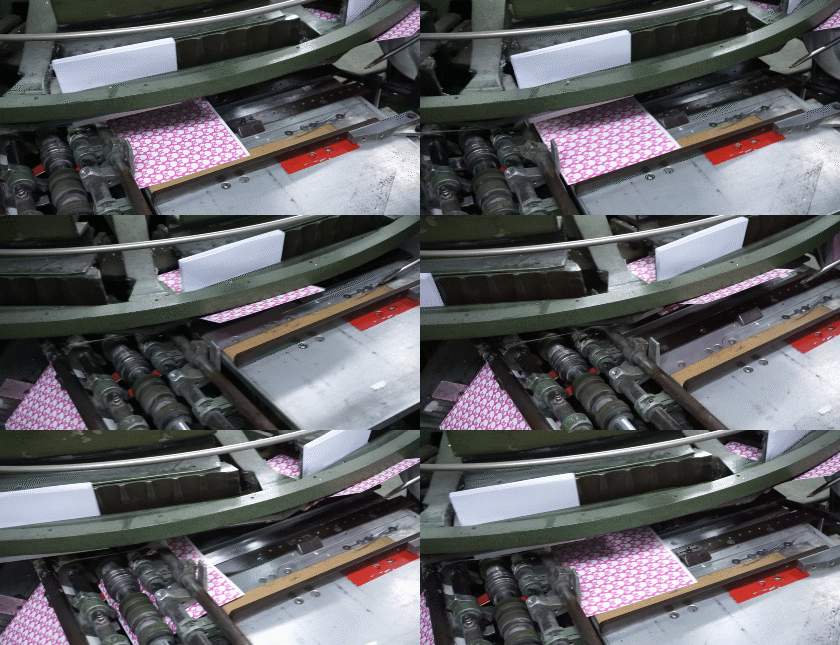
And this high speed two-color printing press:

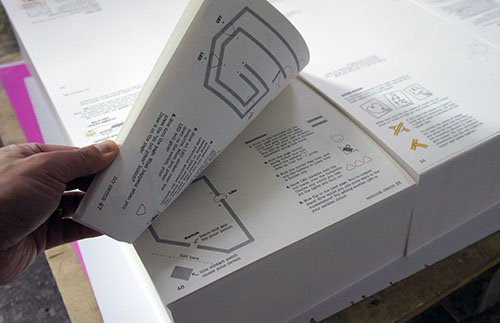
This is probably the very press that the book will be printed on. The paper moves so fast that it’s just a blur as an animated gif. I estimate it does about 150 pages per minute, and each page is about a meter across, which gives it an effective throughput of over a thousand book-sized pages per minute. Even for a run of a couple thousand books, this machine would only print for about 15 minutes before it has to stop for a printing plate swap, an operation which takes a few minutes to complete. This explains why books don’t get really cheap until the volume reaches tens of thousands of copies.

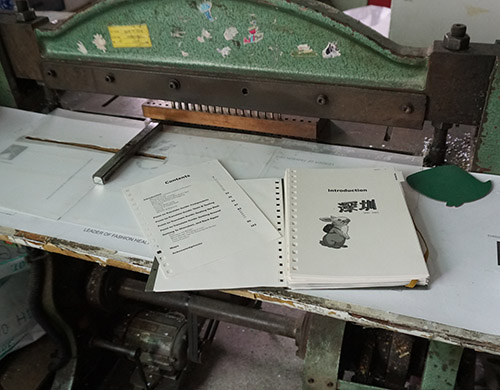
Above is the holepunch used for building prototypes of ring-bound books. The production punch is done using a semi-automated high-volume die-cutter, but for the test prints, this is the machine used to punch out the holes.

The ring binding itself is done by a fairly simple machine. The video above shows the process used to adjust the machine’s height for a single shot on the prototype book. In a production scenario, there would be a few workers on the table to the left of the binding machine aligning pages, adding the covers, and inserting the ring stock. Contrast this to the fully automated perfect binding machine shown at the top of this post — ring binding is a much more expensive binding style in this factory, since they haven’t automated the process (yet).

I also got a chance to see the machine that gilds and debosses the book cover. It’s a bit of a different process than the edge-gilding I described in the previous post about designing the cover.

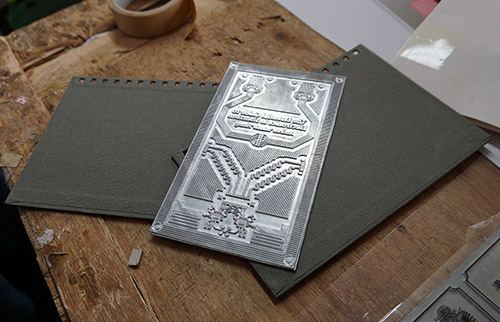
Here, an aluminum plate is first made with the deboss pattern. It looks pretty neat — I’ve half a mind to ask the laoban if he’d save the used plates for me to keep as a souvenir, although the last thing I need in my tiny flat in Singapore is more junk.

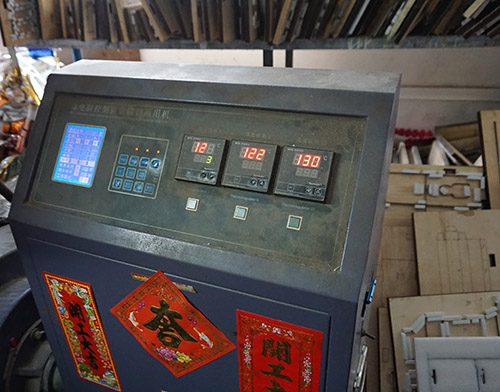
The plate is then glued into a huge press. This versatile machine can do debossing, die cutting, and gilding on sheets of paper as large as A0. For the gilding operation, the mounting face for the aluminum plate is heated to around 130 degrees Celsius.

I think it’s kind of cute how they put good luck seals all over the machines. The characters say “kai gong da ji” which literally translated means “start operation, big luck”. I don’t know what’s the underlying reason — maybe it’s to wish good luck on the machine, the factory, or the operator; or maybe fix its feng shui, or some kind of voodoo to keep the darned thing from breaking down again. I’ll have to remember to ask what’s the reason for the sticker next time I visit.

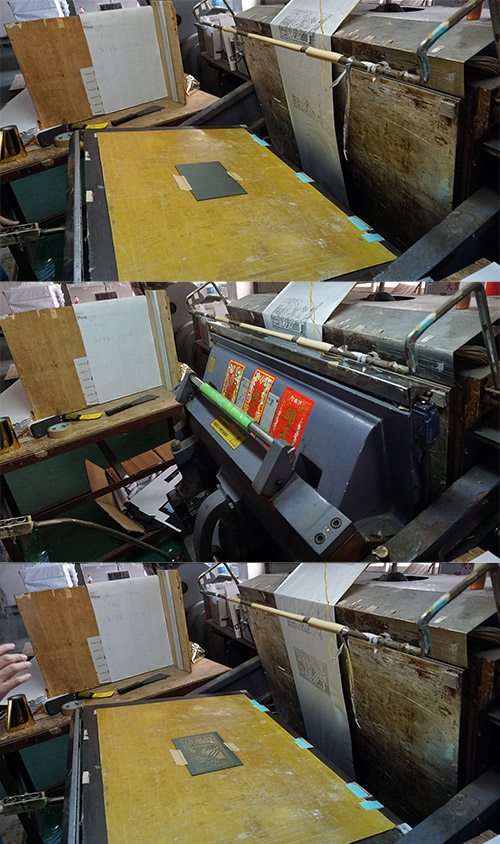
Once at temperature, the gilding foil is drawn over the plate, and the alignment of the plate is determined by doing a test shot onto a transparent plastic sheet. The blank cover is then slid under the sheet, taped in place, and the clear sheet removed.

The actual pressing step is very fast — so fast I didn’t have a chance to turn my camera into video mode, so I only have a series of three photos to show the before, pressing, and after states.
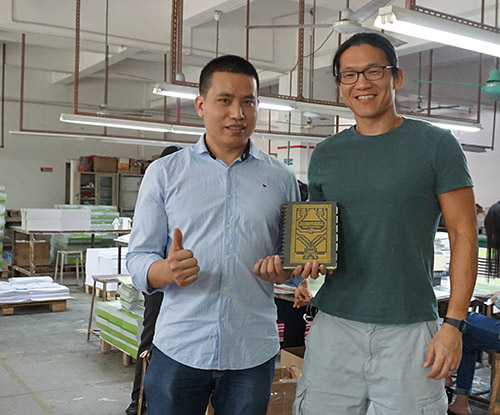
And here’s a photo of me with the factory laoban (boss), showing off the latest prototype. I’ve often said that if you can’t meet the laoban, the factory’s too big for you. Having a direct relationship with the laoban has been helpful for this project; he’s very patiently addressed all my strange customization requests, and as a side bonus he seems to know all the good restaurants in the area so the after-work meals are usually pretty delicious.

I’m looking forward to getting production started on the book, and getting all the pledge rewards delivered on-time. Now’s the last chance to back the crowd funding campaign and get the book at a discounted price. I will order some extra copies of the book, but it’s been hard to estimate demand, so there’s a risk the book could sell out soon after the campaign concludes.

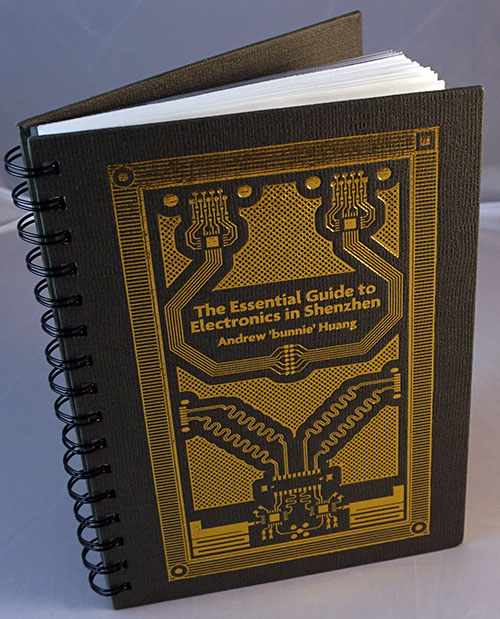
The Story Behind the Cover for
The Essential Guide to Electronics in Shenzhen

Wednesday, February 24th, 2016

First, I want to say wow! I did not expect such a response to this book. When preparing for the crowdfunding campaign, I modeled several scenarios, and none of them predicted an outcome like this.

The Internet has provided fairly positive feedback on the cover of the book. I’m genuinely flattered that people like how it turned out. There’s actually an interesting story behind the origins of the book cover, which is the topic of this post.

It starts with part of a blog post series I did a while back, “The Factory Floor, Part 3 of 4: Industrial Design for Startups”. In that post, I outline a methodology for factory-aware design, and I applied these methods when designing my book cover. In particular, step 3 & 4 read:

3. Visit the facility, and take note of what is actually running down the production lines. … Practice makes perfect, and from the operators to the engineers they will do a better job of executing things they are doing on a daily basis than reaching deep and exercising an arcane capability.

4. Re-evaluate the design based on a new understanding of what’s possible, and iterate.

My original cover design was going to be fairly conventional – your typical cardboard laminated in four color printing, or perhaps even a soft cover, and the illustration was to be done by the same fellow who did the cute bunny pictures that preface each chapter, Miran Lipovača.

But, as a matter of practicing what I preach, I made a visit to the printing factory to see what was running down its lines. They had all manners of processes going on in the factory, from spine stitching to die cutting and lamination.


Chibitronics’ Circuit Sticker Sketchbook is also printed at this factory

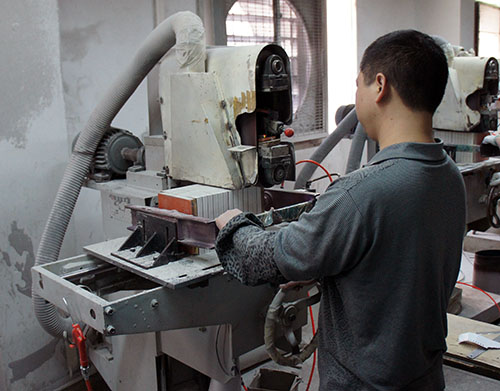
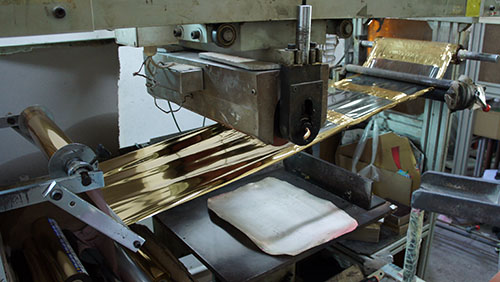
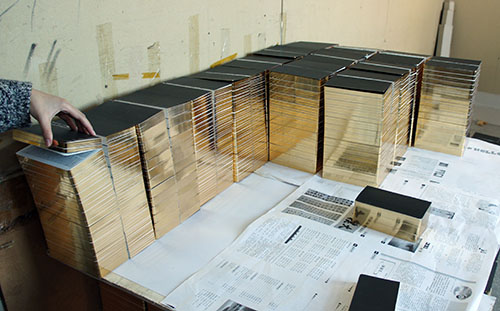
One process in particular caught my eye – in the back, there was a room full of men using belt sanders with varying grits of sand paper to work the edges of books until they were silky smooth. Next to that was a hot foil transfer machine – through heat and pressure, it can apply a gold (or any other color) foil to the surface of paper. In this case, they were gilding the edges of books, in a style similar to that found on fancy bibles and prayer books. They could also use the same process to do a foil deboss on cardboard.


Beltsanding the edges of a stack of books until they are silky smooth


Closeup of the hot foil transfer mechanism


Stacks of books with gleaming, gilded edges

This is when I got the idea for the cover. These gilded books looked beautiful – and because the process is done in-house, I knew I could get it for a really good price. So, I went back to the drawing board and thought about what would look good using this process. The first idea was to take the bunny picture, and adapt it for the gold foil process. Unfortunately, the bunny illustrations relied heavily upon halftone grays, something which wouldn’t translate well into a gold foil process. Someone else suggested that perhaps I should do a map of China, with Shenzhen marked and some pictures of components around it. I didn’t like it for a number of reasons, the first one being the headache of securing the copyright to a decent map of China that was both geographically accurate and politically correct.

So I did a Google image search for “gold leaf covers” just to see what’s out there. The typical motif I observed was some kind of filigree, typically with at least left/right symmetry, if not also up/down symmetry.

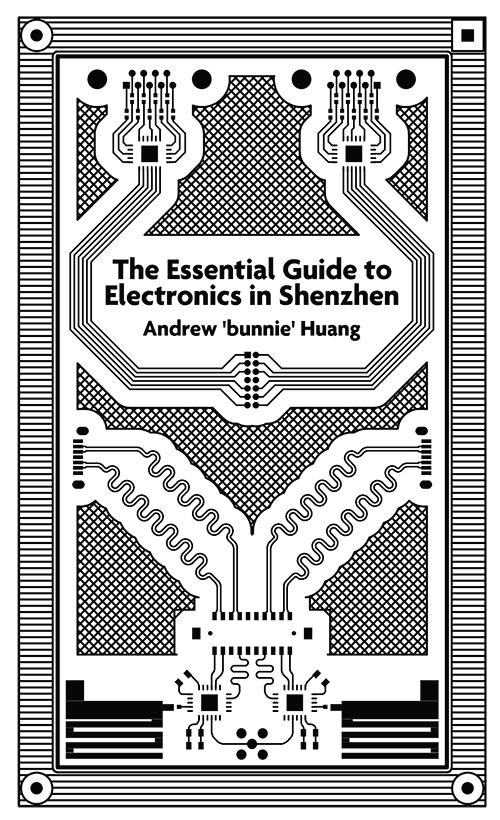
I thought maybe I’d go and fire up Adobe Illustrator and start sketching some filigree patterns, but quickly gave up on that idea – it was a lot of work, and I’m not entirely comfortable with that tool. Then it hit upon me that individual PCB layers have the same sort of intricacy as a filligree – and I live and breathe PCB design.

So, I started up my favorite PCB design package, Altium. I tried playing around a bit with the polygon fill function, using its hashing feature and adjusting the design rules to see if I couldn’t make a decent filigree with it. The effect seemed reasonable, especially when I used a fairly coarse fill and an additional design rule that caused polygon fills to keep a wide berth around any traces.

Then I had to come up with some circuitry to fill the cover. I looked at a few of my circuit boards, and in reality, few practical circuits had the extreme level of symmetry I was looking for. So I went ahead and cocked up a fake circuit on the fly. I made a QFN footprint based on fictional design rules that would look good, and sorted through my library of connector footprints for ones that had large enough pads to print reasonably well using the foil transfer process. I found a 2.4GHz antenna and some large-ish connectors.

I then decided upon a theme – generally, I wanted the book to go from RF on the bottom to digital on the top. So I started by drawing the outline of an A5 page, and putting a couple lines of symmetry down. In the lower left, I placed the 2.4 GHz antenna, and then coupled it to a QFN in a semi-realistic fashion, throwing a couple of capacitors in for effect. I added an SMA connector that spanned the central symmetry line, and then an HRS DF-11 connector footprint above it. I decided in the RF section I’d make extensive use of arcs in the routing, calling upon a motif quite common in RF design and visually distinct from digital routing. Next I added a SATA connector off to the middle edge, and routed a set of differential pairs to the TX/RX pads, to which I applied the trace length equalization feature of the PCB tool to make them wavy – just for added aesthetic effect.

Then I started from the top left and designed the digital section. Nothing says “old school digital” to me louder than a DB-9 connector (and yes, you pedants, it’s technically a DE-9, but in my heart it will always be a DB-9), so I plopped one of those down up top. I decided I’d spice things up a bit by throwing series termination resistors between the connector and a fake QFN IC; yes, in reality, not all pins would have these, but I thought it looked more aesthetic to put it on all the pins. Then, I routed signals from the QFN as a bus, this time using 45 degree angles, to a 14-pin JTAG connector which I placed in the heart of the book. Everything starts and ends with the JTAG connector these days, so why not?

The design now occupied just the left half of the board. I copied it, flipped it, and pasted it to create a perfect 2-fold symmetry around the vertical axis.

Around all of this, I put a border with fiducials and gutters, the same as you would find in a PCB destined for production in an automated SMT line. You’ll notice I break symmetry by making the top right fiducial a square, not a circle; this is a hallmark feature of fiducials, since their purpose is to both align the vision recognition systems and determine if the PCB has been loaded into the machine correctly.

Finally, I added the book title and author using Altium’s TrueType string facility, and ran an automated fill of the empty space to create the filigree.

I actually designed the whole cover while I was on the long flight from Hong Kong to Amsterdam for 32C3. I find that airplane flights are excellent for doing PCB routing and design work like this, free of any distractions from the Internet. As a bonus, every now and then someone comes along and feeds you and tops up your glass of wine, allowing your creative streak to be unbroken by concerns about hunger or sobriety.

When viewed in black and white, the book cover honestly looks a little “meh” – when I first saw it, I was thought, “well, at least maybe the geeks will appreciate it”. But after seeing the faux-linen with gold foil transfer sample, I knew this was the design I would run with for production.

The next difficult challenge was to not paint legs on the metaphorical snake. As an engineer, I disliked how over-simplified the design was. There really should be bypass capacitors around the digital components. And SATA requires series DC blocking caps. But I had to let all that go, set it aside, and stop looking at it as a design, and let it live its own life as the cover of a book.

And so there you have it – the story behind perhaps the only book cover designed using Altium (if you have a gerber viewer, you can check out the gerber files). The design went from a .PcbDoc file, to a .DXF, to .AI, and finally placed in a .INDD – not your typical progression of file formats, but in the end, it was fun and worthwhile figuring it all out.

Thanks again to everyone who helped promote and fund my book. I’m really excited to get started on the print run. The problem I’m facing now is I don’t know how many to print. Originally, I was fairly certain no matter what, I would just barely hit the minimum order quantity (MOQ) of 1,000 books. Now that the campaign has blown past that, I have to wait until the campaign finishes in 23 days before I know what to put on the purchase order to the manufacturer. And, shameless plug – if you’re interested in the book, it’s $5 cheaper if you back during the campaign, so consider getting your order in before the prices go up.

Help Make “The Essential Guide to Electronics in Shenzhen” a Reality

Thursday, February 4th, 2016

Readers of my blog know I’ve been going to Shenzhen for some time now. I’ve taken my past decade of experience and created a tool, in the form of a book, that can help makers, hackers, and entrepreneurs unlock the potential of the electronics markets in Shenzhen. I’m looking for your help to enable a print run of this book, and so today I’m launching a campaign to print “The Essential Guide to Electronics in Shenzhen”.

As a maker and a writer, the process of creating the book is a pleasure, but I’ve come to dread the funding process. Today is like judgment day; after spending many months writing, I get to find out if my efforts are deemed worthy of your wallet. It’s compounded by the fact that funding a book is a chicken-and-egg problem; even though the manuscript is finished, no copies exist, so I can’t send it to reviewers for validating opinions. Writing the book consumes only time; but printing even a few bound copies for review is expensive.

In this case, the minimum print run is 1,000 copies. I’m realistic about the market for this book – it’s most useful for people who have immediate plans to visit Shenzhen, and so over the next 45 days I think I’d be lucky if I got a hundred backers. However, I don’t have the cash to finance the minimum print run, so I’m hoping I can convince you to purchase a copy or two of the book in the off-chance you think you may need it someday. If I can hit the campaign’s minimum target of $10,000 (about 350 copies of the book), I’ll still be in debt, but at least I’ll have a hope of eventually recovering the printing and distribution costs.

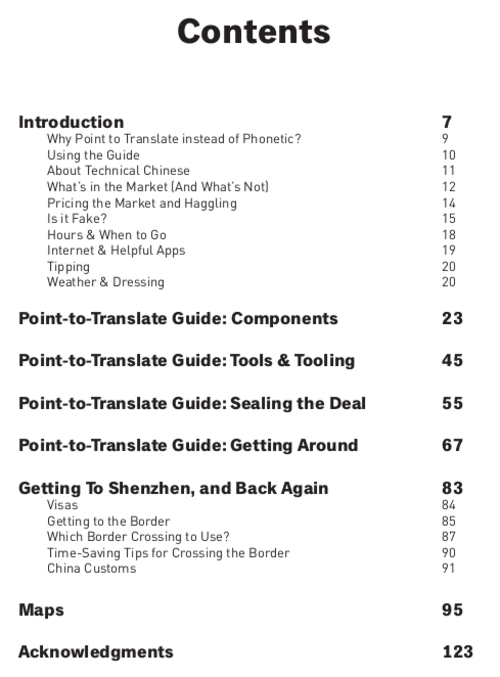
The book itself is the guide I wish I had a decade ago; you can have a brief look inside here. It’s designed to help English speakers make better use of the market. The bulk of the book consists of dozens of point-to-translate guides relating to electronic components, tools, and purchasing. It also contains supplemental chapters to give a little background on the market, getting around, and basic survival. It’s not meant to replace a travel guide; its primary focus is on electronics and enabling the user to achieve better and more reliable results despite the language barriers.

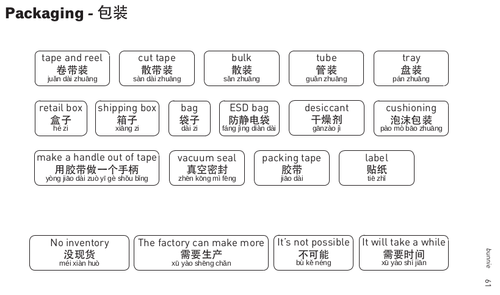
Below is an example of a point-to-translate page:

For example, the above page focuses on packaging. Once you’ve found a good component vendor, sometimes you find your parts are coming in bulk bags, instead of tape and reel. Or maybe you just need the whole thing put in a shipping box for easy transportation. This page helps you specify these details.

I’ve put several pages of the guide plus the whole sales pitch on Crowd Supply’s site; I won’t repeat that here. Instead, over the coming month, I plan to post a couple stories about the “making of” the book.

The reality is that products cost money to make. Normally, a publisher takes the financial risk to print and market a book, but I decided to self-publish because I wanted to add a number of custom features that turn the book into a tool and an experience, rather than just a novel.

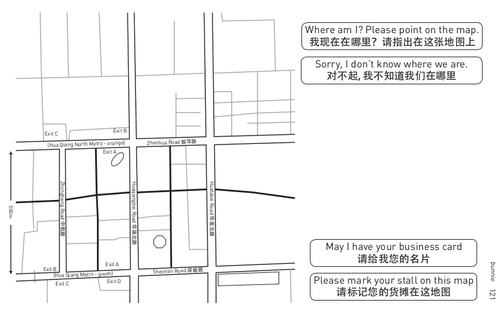
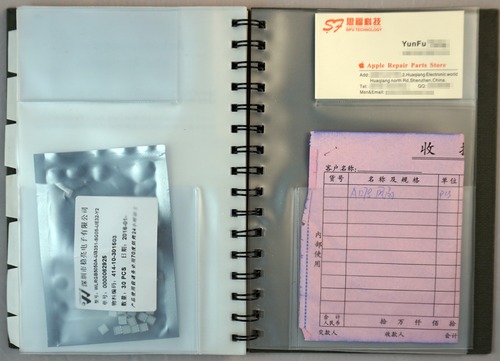
The most notable, and expensive, feature I added are the pages of blank maps interleaved with business card and sample holders.

Note that in the pre-print prototype above, the card holder pages are all in one section, but the final version will have one card holder per map.

When comparison shopping in the market, it’s really hard to keep all the samples and vendors straight. After the sixth straight shop negotiating in Chinese over the price of switches or cables, it’s pretty common that I’ll swap a business card, or a receipt will get mangled or lost. These pages enable me to mark the location of a vendor, associate it with a business card and pricing quotation, and if the samples are small (like the LEDs in the picture above) keep the sample with the whole set. I plan on using a copy of the book for every project, so a couple years down the road if someone asks me for another production run, I can quickly look up my suppliers. Keeping the hand-written original receipts is essential, because suppliers will often honor the pricing given on the receipt, even a couple years later, if you can produce it. The book is designed to give the best experience for sourcing components in the Shenzhen electronic markets.

In order to accommodate the extra thickness of samples, receipts and business cards, the book is spiral-bound. The spiral binding is also convenient for holding a pen to take notes. Finally, the spiral binding also allows you to fold the book flat to a page of interest, allowing both the vendor and the buyer to stare at the same page without fighting to keep the book open. I added an elastic strap in the back cover that can be used as a bookmark, or to help keep the book closed if it starts to get particularly full.

I also added tabbed pages at the beginning of every major section, to help with quickly finding pages of interest. Physical print books enable a fluidity in human interaction that smartphone apps and eBooks often fail to achieve. Staring at a phone to translate breaks eye contact, and the vendor immediately loses interest; momentum escapes as you scroll, scroll, scroll to the page of interest, struggle with auto-correction on a tiny on-screen keyboard, or worse yet stare at an hourglass as pages load from the cloud. But pull out the book and start thumbing through the pages, the vendor can also see and interact with the translation guide. They become a part of the experience; it’s different, interesting, and keeps their attention. Momentum is preserved as both of you point at various terms on the page to help clarify the transaction.

Thus, I spent a fair bit of time customizing the physical design of the book to make it into a tool and an experience. I considered the human factors of the Shenzhen electronics market; this book is not just a dictionary. This sort of tweaking can only be done by working with the printer directly; we had to do a bit of creative problem solving to figure out a process that works to bring all these elements together that can also pump out books at a rate fast enough to keep it in the realm of affordability. Of course, the cost of these extra features are reflected in the book’s $35 cover price (discounted to $30 if you back the campaign now), but I think the book’s value as a sourcing and translation tool makes up for its price, especially compared to the cost of plane tickets. Or worse yet, getting the wrong part because of a failure to communicate, or losing track of a good vendor because a receipt got lost in a jumble of samples.

This all bring me back to the point of this post. Printing the book is going to cost money, and I don’t have the cash to print and inventory the book on my own. If you think someday you might go to Shenzhen, or maybe you just like reading what I write or how the cover looks, please consider backing the campaign. If I can hit the minimum funding target in the next 45 days, it will enable a print run of 1,000 books and help keep it in stock at Crowd Supply.

Thanks, and happy hacking!

Products over Patents

Sunday, November 29th, 2015

NPR’s Audrey Quinn from Planet Money explores IP in the age of rapid manufacturing by investigating the two-wheel self balancing scooter. When patent paperwork takes more time and resources than product production, more agile systems of idea sharing evolve to keep up with the new pace of innovation.

If the embedded audio player above isn’t working, try this link. Seems like the embed isn’t working outside the US…

MLTalk with Joi Ito, Nadya Peek and me

Saturday, November 28th, 2015

I gave an MLTalk at the MIT Media Lab this week, where I disclose a bit more about the genesis of the Orchard platform used to build, among other things, the Burning Man sexually generated light pattern badge I wrote about a couple months back.

The short provocation is followed up by a conversation with Joi Ito, the Director of the Media Lab, and Nadya Peek, a renowned expert in digital fabrication from the CBA (and incidentally, the namesake of the Peek Array in the Novena laptop) about supply chains, digital fabrication, trustability, and things we’d like to see in the future of low volume manufacturing.

I figured I’d throw a link here on the blog to break the monotony of name that wares. Sorry for the lack of new posts, but I’ve been working on a couple of books and magazine articles in the past months (some of which have made it to print: IEEE Spectrum, Wired) which have consumed most of my capacity for creative writing.