The ware for this month is shown below. Click on the images for a much larger version.
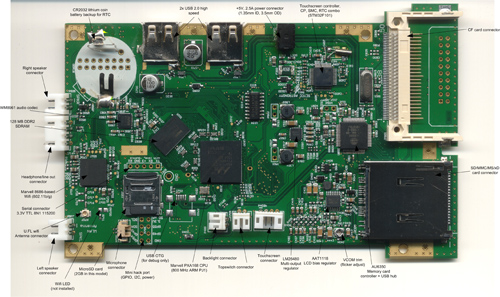
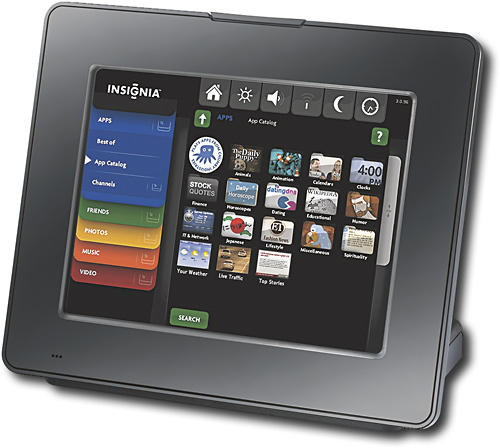
For this month, I’ll tell you what the ware is — it’s the mainboard of the Insignia Infocast. Insignia, for those who are not familiar with it, is a Best Buy exclusive brand.
The challenge, this time, is to guess the number of vias on the main board (including estimating those that are not visible and covered up by components on both sides — so just counting the visible ones will leave you a few short). To be clear, pad and mounting holes don’t count as vias for this competition, and I will judge by “Price is Right” rules (closest to but not exceeding the actual count), with the first correct submission winning (don’t worry, if your comment is held in moderation, the original comment post time is preserved and I use that to judge). If you make multiple submissions, the last submission is the only one that counts. The competition will run for at most a month, but may end sooner if contestants get very close to the correct answer.
The prize is an Insignia Infocast.
About the Infocast
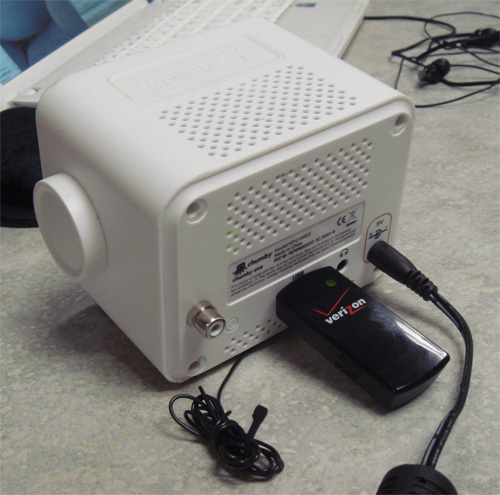
The Infocast is an Internet Media Display — sort of a new device category. It’s what you get when you put chumby software technology into an otherwise unconnected device. The chumby One and the Sony dash
 are also kin to the Infocast. Unlike the iPad
 , whose roots lie in the mobile world, Internet Media devices are the supercharged descendants of common unconnected household appliances — clock radios, digital photo frames, and the likes. Hence the form factor of these devices are targeted at fixed installations in the bedroom, livingroom or kitchen, with a lower price point and subdued design reflecting their humbler origins. However, despite having a much lower price and a different lineage than smart phones, netbooks and tablets, its features and capabilities are often similar enough to high-end mobile products that many try to compare the two, when in fact they are meant to compliment each other.
Aside from being able to play chumby apps on an 8″ screen at 800×600 resolution (here’s a nod to everyone who has asked for a larger-screen chumby over the years), the Infocast also has a rich set of capabilities built around photo sharing, reflecting its roots in the digital photoframe space (as covered by Engadget in CES 2009 and hackaday). It has the ability to natively read photos and videos off of SD, SDHC, MMC, XD, Memory Stick, Compact Flash, and USB format media; there’s also an integrated photo management utility that allows you to upload these photos directly to the on-line photo sharing service Photobucket, or share them directly with other users that own chumby-powered devices whom you’ve friended inside the chumby network. This latter feature is very handy for sharing photos with techno-phobes: just give them a pre-configured chumby-powered device, and you can send them your latest photos with a drag-and-drop gesture from your Infocast; they’ll receive them without ever having to touch a browser, smartphone or PC.
DIY Friendly Hardware
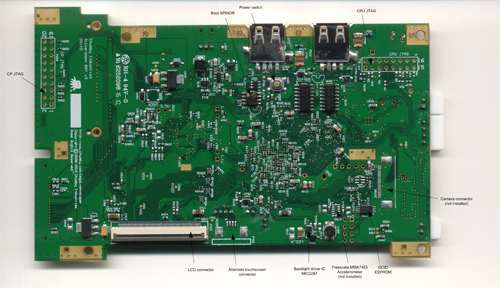
Since I had a direct role in designing the internal electronics for the Infocast (unlike the Sony dash), I tried to put some DIY-friendly features in the PCB layout. First, there’s an internal, 3.3V 115200 8N1 serial port with its connections documented on the silkscreen of the PCB. Second, there’s also an internal “mini mod port” right next to the socketted microSD firmware drive. The mini mod port has only eight pins, but it breaks out 3.3V power, I2C, and a couple GPIOs for you to play with; it also has its pinout documented on the silkscreen for your convenience. Third, I left a few unpopulated features on the PCB for DIY’ers that want to take it up a notch and solder in a 3-axis accelerometer or a cellphone-style digital camera (granted, those things are very hard to source, so the camera in particular is pretty much a double-black-diamond mod). Strictly speaking, the Infocast is rather closely based on the “silvermoon” platform reference design that chumby provides (see schematics), so it’s not Open with a capital “O” but it’s open enough for easy modification — a bit of a compromise, I recognize, but still a positive step in the direction of enabling Makers and modders to gain deeper utility out of stuff found inside a Best Buy. Also along this vein, the plastic case design is entirely Best Buy’s, so unlike the chumby One, drawings and 3D files of the case are not available.
To open up the device, there are four screws on the bottom, hidden underneath the rubber feet. There is also a friction-lock tab you need to disengage by jamming a small flathead screwdriver into the small gap between the top and bottom plastic pieces above the USB2 connector. It also helps to remove the CR2032 battery before trying to remove the bottom of the case. Of course, opening the device voids your warranty, so you can’t return it to Best Buy after you do this!
Modding the Software
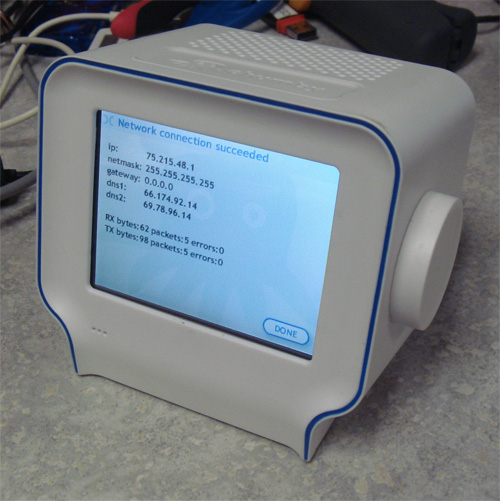
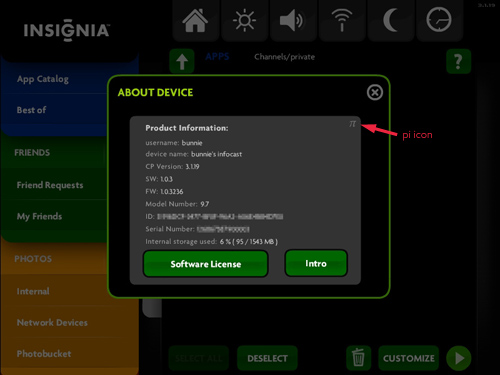
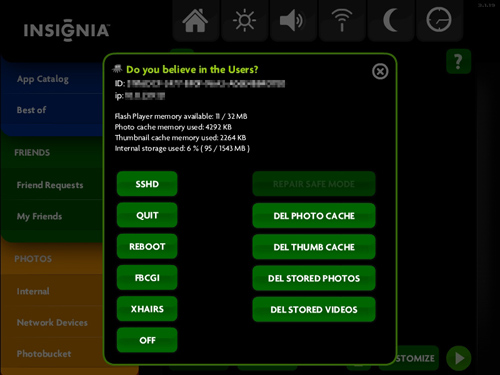
There is a facility in the firmware for enabling ssh on the Infocast (putty is a decent, free ssh client). From the main screen (the screen with a black background and a left nav panel, not the home screen with the green background and a few icons in the middle), touch the Insignia logo, and an About dialog box pops up. Touch the “pi” icon in the top right near the close button, and you’ll get the old “Do you believe in the Users?” dialog box that you may recognize from other chumby devices. There, you can start sshd, and perform a few other handy tasks, such as enabling fbcgi, which was used to take the screen shots you see below.
Of course, once you’ve ssh’d into the device, the question is what can you do with it? Fortunately, xobs (who also brought quake, 3G, and composite video to the chumby One) left, in my opinion, the best Easter Egg of all inside the firmware. If, on the command line, you type “gcc” or “make”, the firmware will prompt you if you want to download and install a native toolchain on the device.
chumby-18-0b-72:~ # gcc
GCC isn't on this device by default, but it's possible to download a
package and install it.  If you like, we can try fetching one from
http://files.chumby.com/hacks/silvermoon_toolchain.sh and installing it.
Install toolchain? [Y/n]
That’s right–no more need to install a cross-compiler to code on this device. This will install a native ARM compiler, make, plus other handy stuff (like bison, flex, binutils…) so that many source packages “just work” (you’ll have to be a little bit careful about your install path because the rootfs is read-only by default, because the free space in / is not very large — but you can get around that by either doing a “mount -o remount,rw /” and installing it on / (if it fits), or setting up your install path to point to /mnt/storage, where about 1.5G of space exists). Here’s an example of what the install transcript looks like. And…the obligatory reminder…modifying your device like this voids your warranty as well.
There’s also a couple other really handy utilities that xobs left in the device. One is called “regutil”. This is like PEEK and POKE from the Bad Old Days. I love this utility, as it lets me get right in touch with the hardware — who needs stinkin’ virtual memory protection?? Of course, you can do Evil things with this utility, so use with care. In order to tickle the three GPIOs you’ve got available on the mini mod header, you can simply use regutil like this:
1) Start by making sure all three pins are GPIOs:
    regutil -c MFP_49=7 -c MFP_54=7 -c MFP_55=7

2) Set all three pins as outputs:
    regutil -w GPIO2_PDR=0x00c20000

3) Set them all high:
    regutil -w GPIO2_PSR=0x00c20000

4) Set them all low:
    regutil -w GPIO2_PCR=0x00c20000
If you solder on a ~100 to 200 ohm resistor in series with a red LED between a GPIO and ground, you should be able to make it wink on and off using these shell commands — no C necessary!
The other thing xobs gave to me to post here is an example program for tickling the I2C port. This will help accelerate folks who just want to knock out an I2C controlled peripheral using the Infocast.
So as far as DIY’ers and modders are concerned, the Infocast is just a $169, 800 MHz ARM Linux computer with 128 MB of DDR2, 2 GB of mass storage and an 8″, 800×600 touchscreen display, and there’s even a pre-built, easy to install native compiler available for it. There’s also two USB ports on the back — conveniently, one for keyboard, one for mouse if you care to use them. I reckon this may be one of the cheapest “full” (e.g. with LCD and case) Linux computers in its performance class that you can buy on the retail market…cheaper in practice than the OLPC XO-1 (although to be fair the Infocast lacks a battery and that awesome daylight readable transreflective display), yet nearly double the MHz of the XO-1, Sony dash, and the chumby One.
So, can it run Android? can it run a browser? can it run MAME? can it turn on your coffee maker? can it control a robot?
It’s up to you.
Happy hacking!