The Ware for November 2023 is shown below.
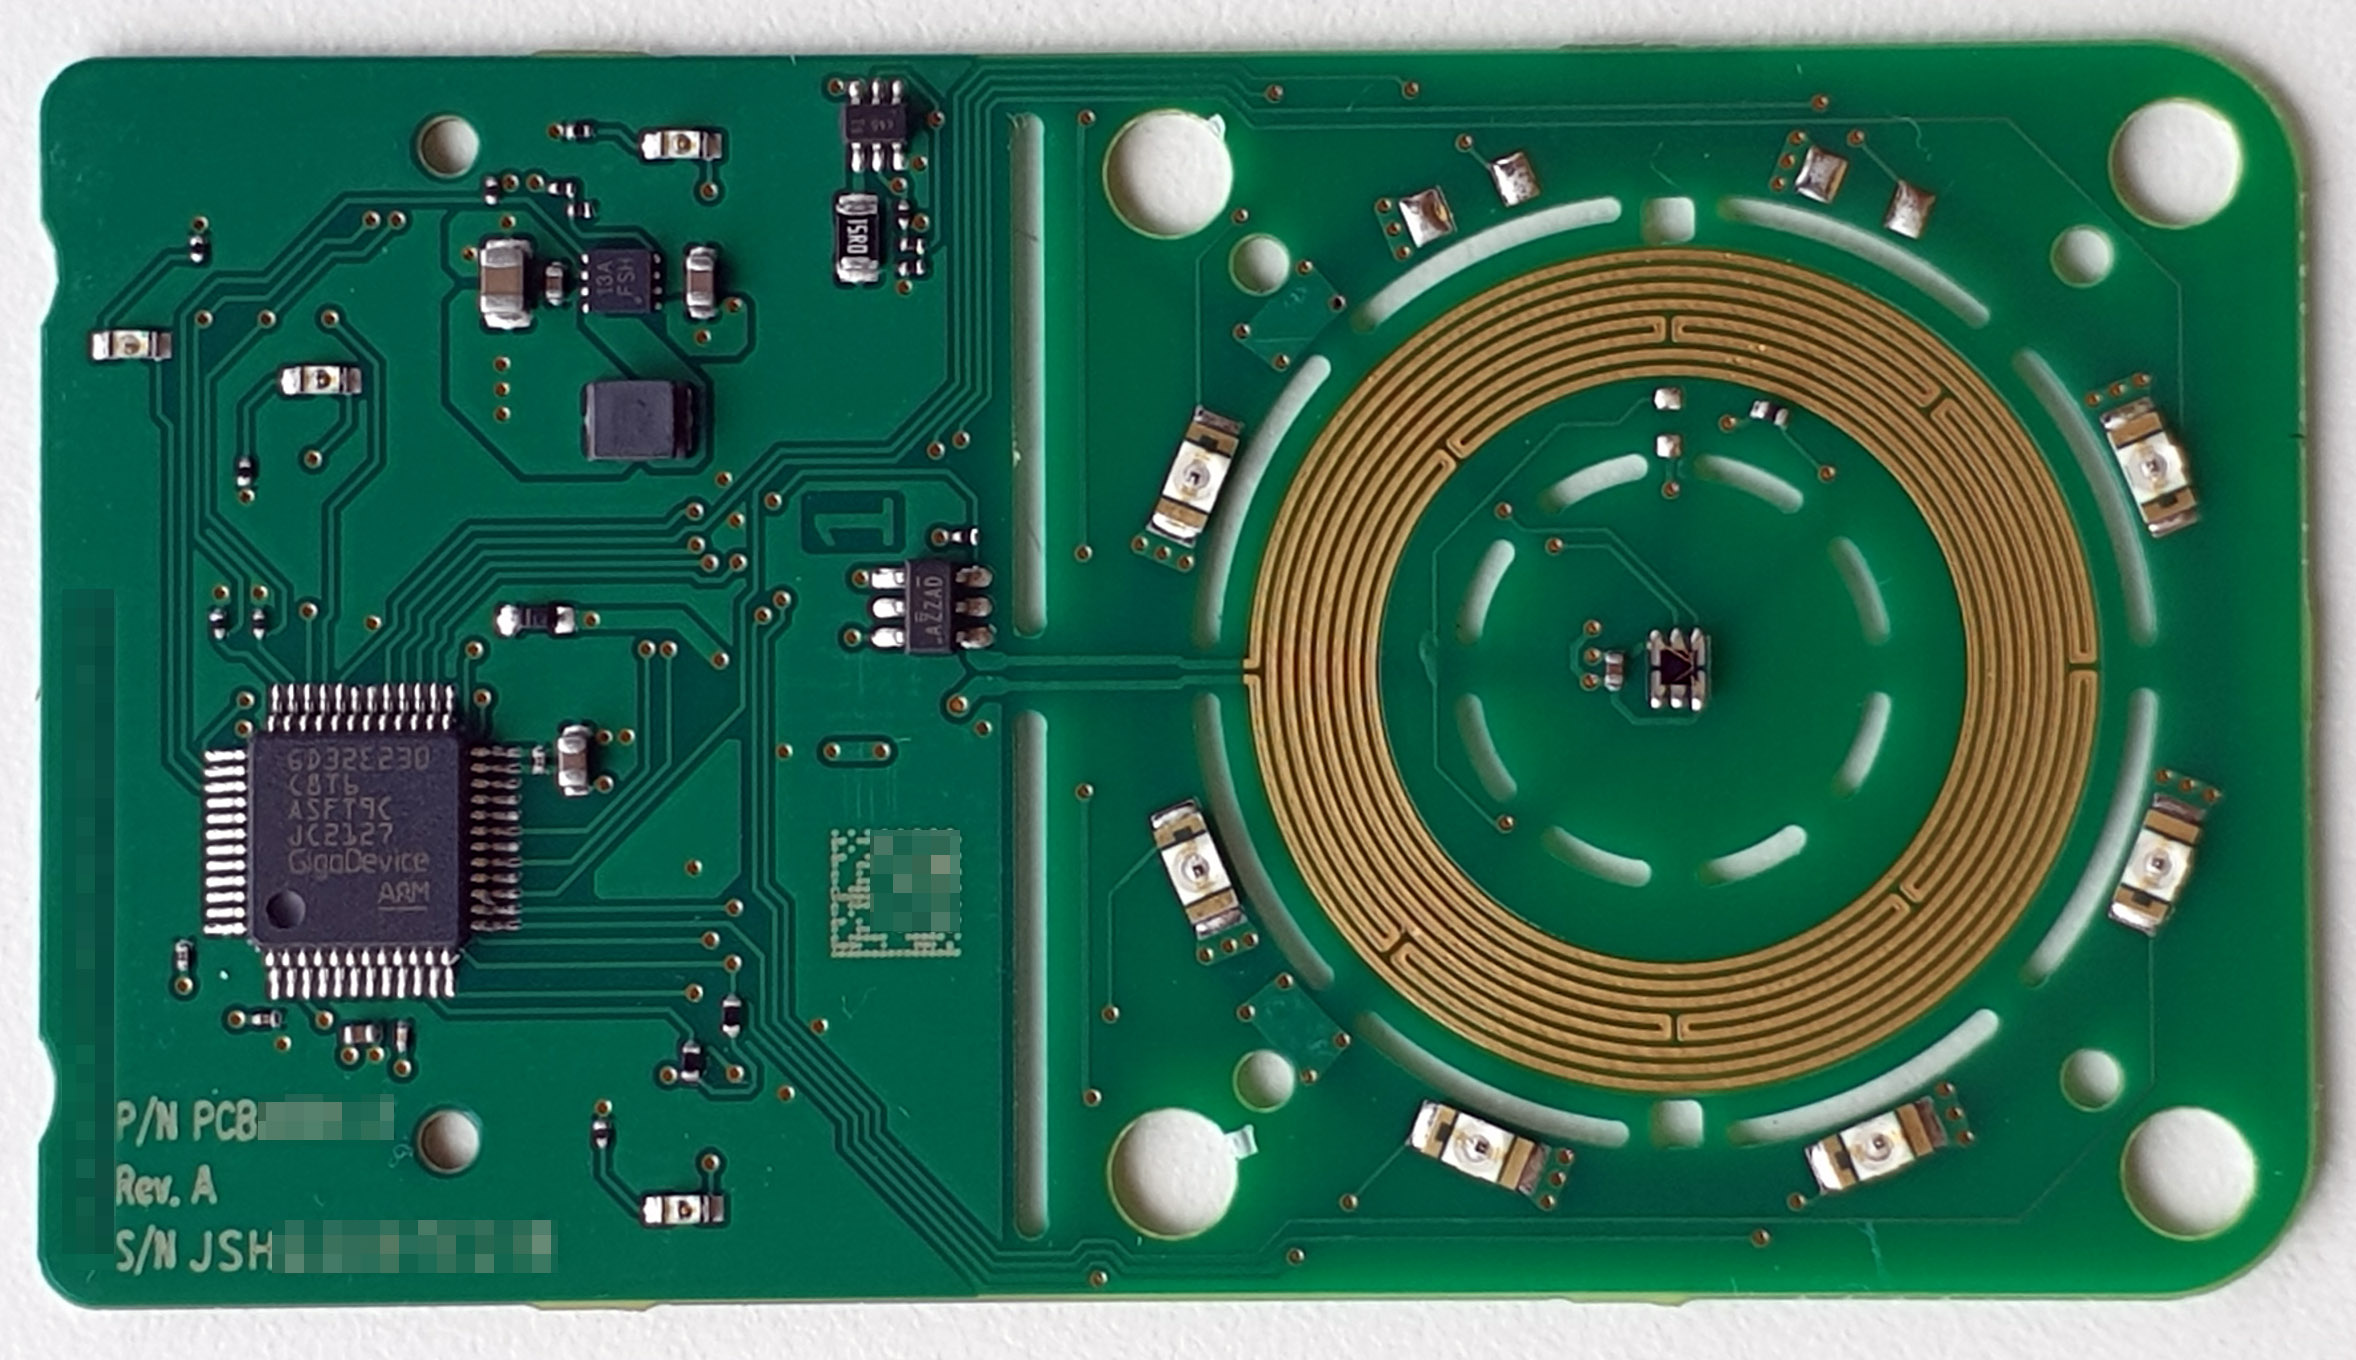
Thanks to Zack Weinberg for mailing me this device to take apart and share!
The Ware for November 2023 is shown below.
Thanks to Zack Weinberg for mailing me this device to take apart and share!
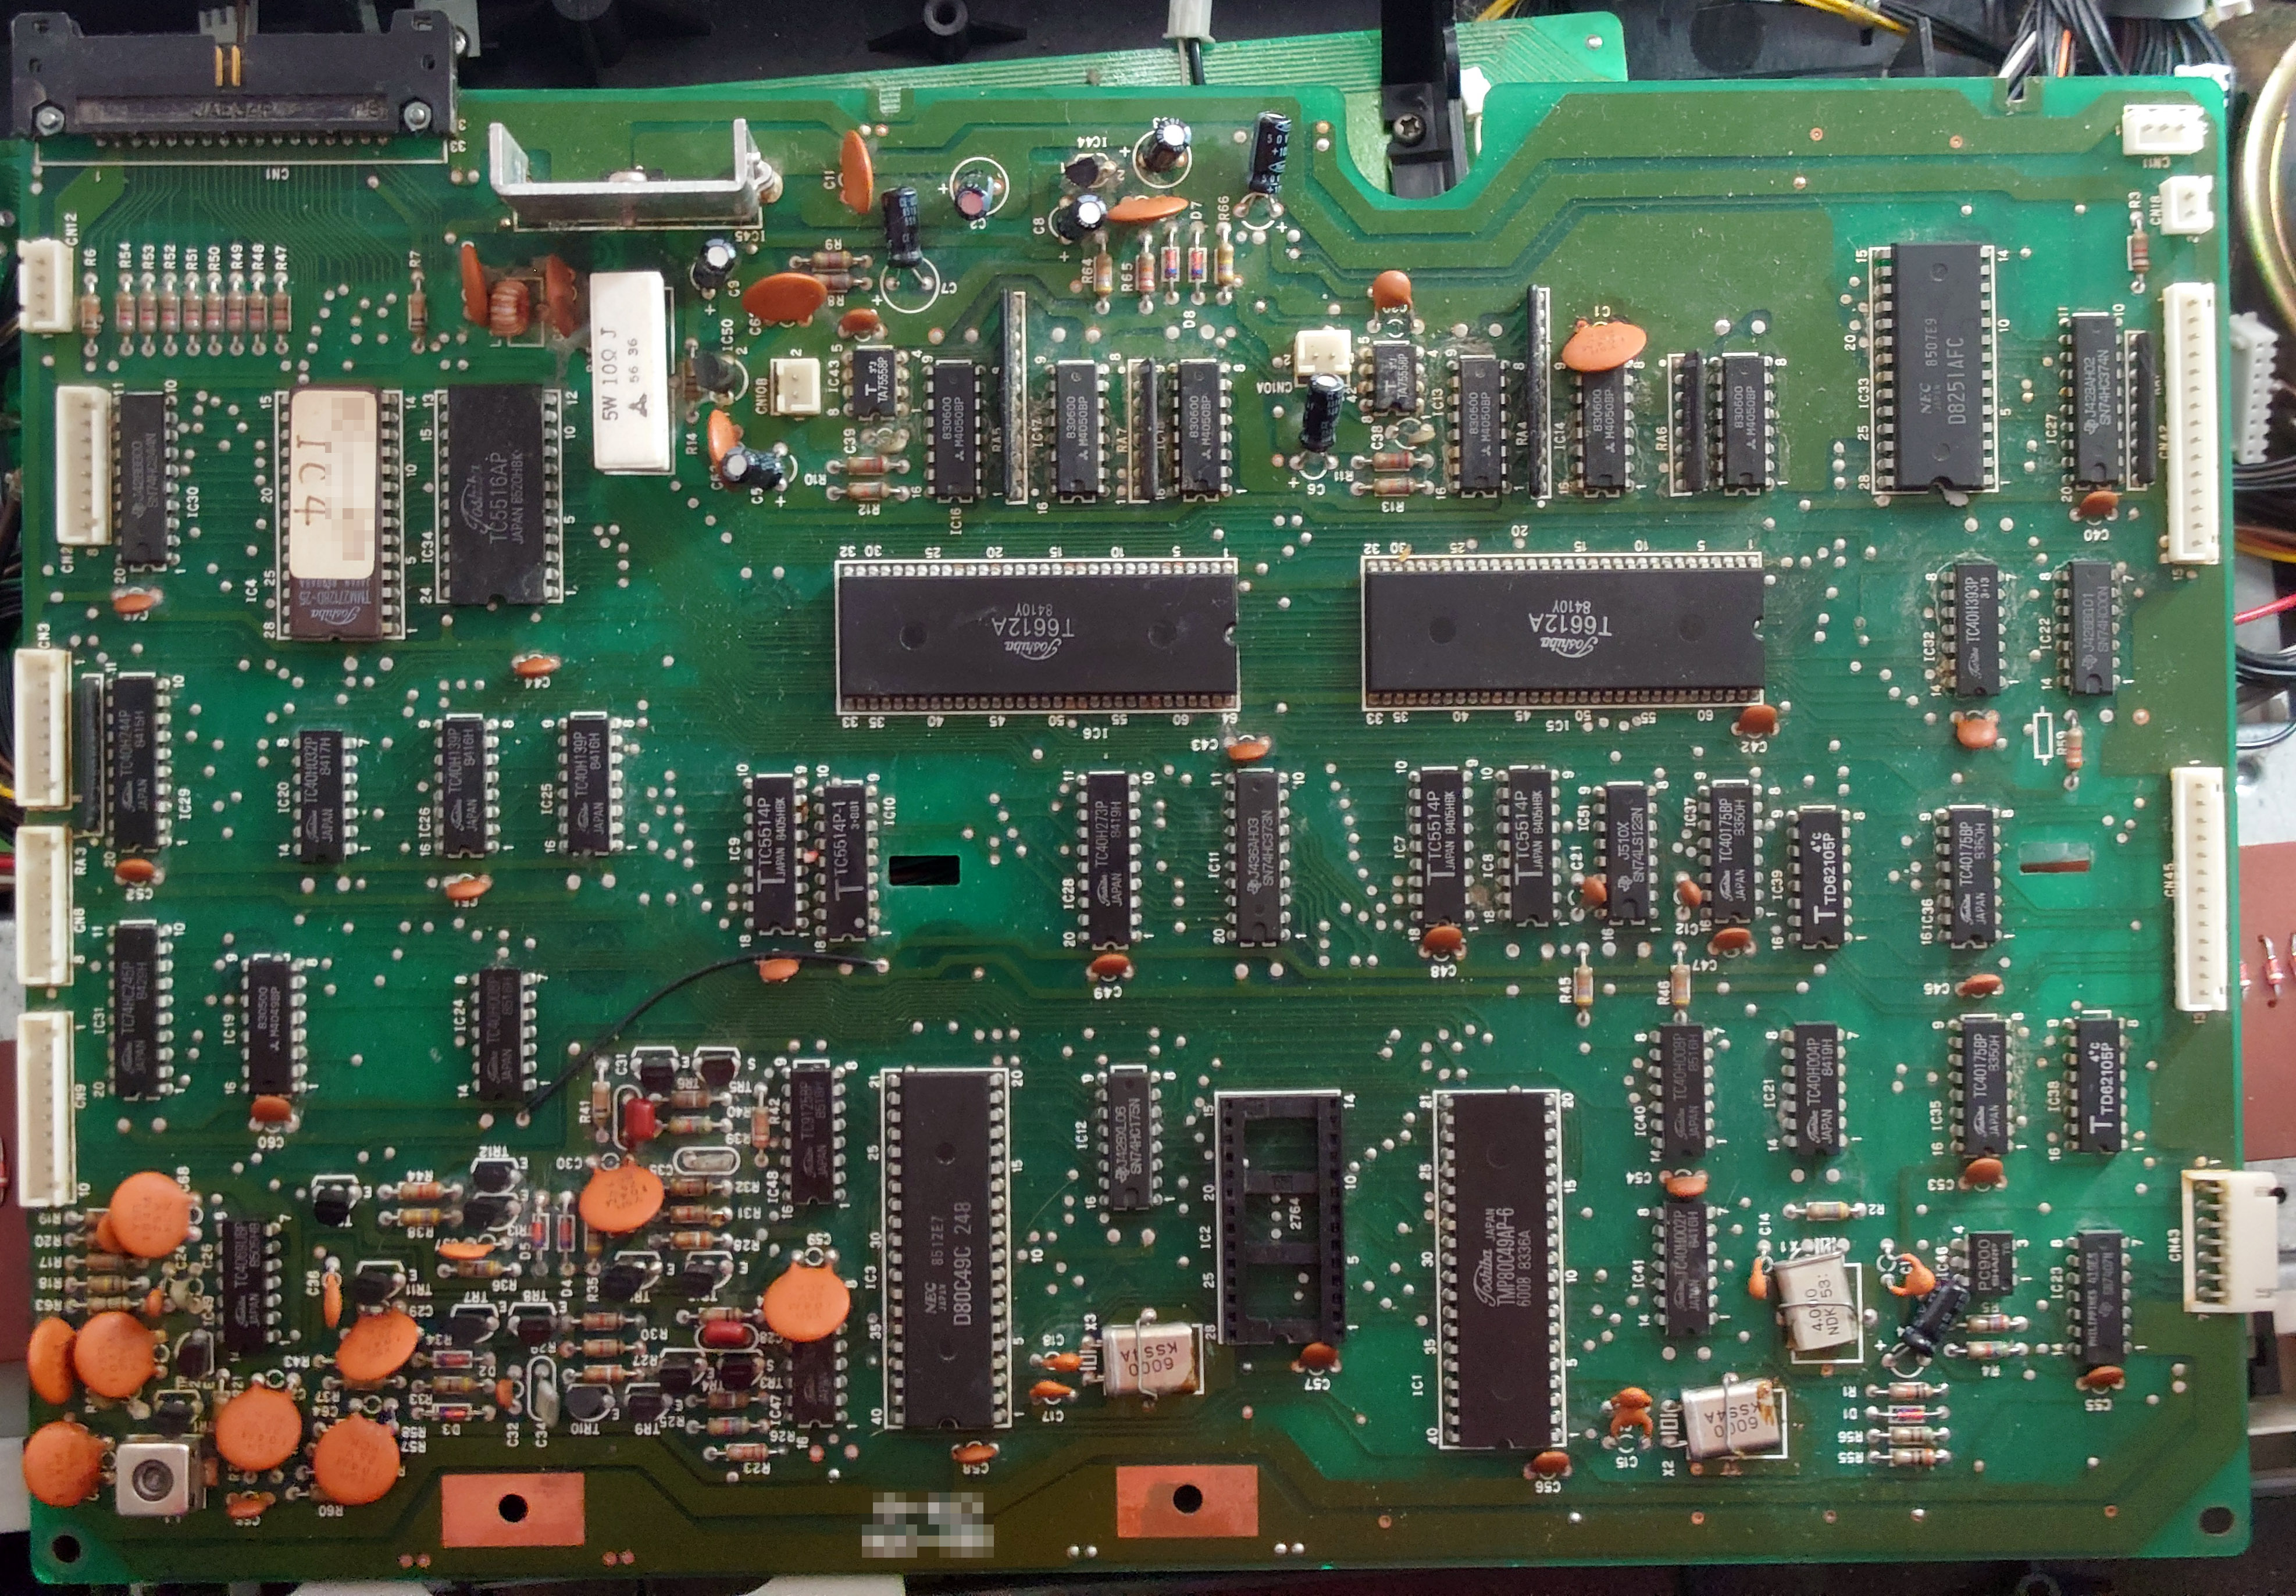
The Ware for October 2023 is a Seiko DS-250 keyboard synthesizer.

Nobody guessed the exact make and model of the keyboard, but it was really entertaining to see the comment thread puzzle through the design. The dual 8049’s caught my attention too, as well as the lack of obvious DACs. I have some partial photos of the associated I/O board, and it also lacks an obvious DAC — mostly just generic mixer/amp/analog switch components on there, so I’d agree with the idea that the DAC could be integrated into one of the big Toshiba chips (or perhaps they are doing something with PWM).
I’ll give the prize to Cary Roberts for being the first to guess the general class of ware (congrats and email me for your prize!). Lots of attention to detail to what I had accidentally left in the background after the crop, I didn’t even notice the rollover diodes in the background until someone pointed it out!
Thanks again to JeffreyO for contributing these photos!
The Ware from September 2023 is a Honeywell HPMA115S0-XXX PM2.5 sensor. Although Ben guessed the general category of the ware first, David was the first to give the exact model. Usually I award the prize to the first person to give an exact, correct model number and fall back to category-of-ware only if no correct model number was named. So, congrats to David for nailing the exact make and model of the ware. email me for your prize!
I had the misfortune of setting up a Windows 11 machine and being confronted with creating a mandatory Microsoft account. I can’t concisely explain why being forced to create an account bothers me so much, but generally when a vendor tries this hard to get you to do something, it’s not for a user-friendly reason.
Anyways, after a bit of searching I found that Rufus is able to create a Windows 11 boot image that can bypass the account setup requirement; but for various reasons I just wanted to modify the OEM configuration.
After poking through the Rufus source code for a bit, I found the pointy end of the stick, applied the patch, and it worked.
Here’s my notes on how I did it — mostly so I have it someplace where I won’t lose it, but also maybe because someone else might find it useful. NB: Microsoft seems to have been paying attention and hardening their setup process against work-arounds to account setup, so the shelf life of this post might not be so long.
Assuming you have a brand new machine with a Windows 11 OEM pre-install, and you have not yet turned it on:
During setup, I connected to the Internet using a wired Ethernet line, so I could easily cut the internet by pulling the cable out if things went wrong and I had to try again (if you do set up by wifi, it’s a bit more complicated to cut internet). In my trials I did end up connecting a couple times and allowing the system to update, and that didn’t impact my ability to pull off the procedure in the end.
The specific commands I used within Ubuntu to access the unattended installer manifest were:
sudo su
ntfsfix /dev/nvme0n1p3
mount /dev/nvme0n1p3 /mnt
nano /mnt/Windows/panther/unattend.xml
But the exact path to the Windows partition will probably be different depending on your OEM and hardware configuration. The right partition is probably the biggest partition, so you can use fdisk to inspect your disk and guess the exact path for your machine.
The XML I injected was this snippet:
<RunSynchronousCommand wcm:action="add">
<Order>1</Order>
<Path>reg add HKLM\\SOFTWARE\\Microsoft\\Windows\\CurrentVersion\\OOBE /v BypassNRO /t REG_DWORD /d 1 /f</Path>
</RunSynchronousCommand>
Stick it in the first “settings” block, just after the “component” block. So overall, the top of the unattended.xml file on my machine ends up looking like this:
<?xml version='1.0' encoding='utf-8'?>
<unattend xmlns="urn:schemas-microsoft-com:unattend">
  <settings pass="specialize">
    <component name="Microsoft-Windows-Shell-Setup" processorArchitecture="amd64" publicKeyToken="xxxxxxxxxxxxxxxx" language="neutral" versionScope="nonSxS" xmlns:wcm="http://schemas.microsoft.com/WMIConfig/2002/State" xmlns:xsi="http://www.w3.org/2001/XMLSchema-instance">
      <OEMName>Lenovo</OEMName>
      <OEMInformation>
        <Logo>c:\windows\system32\oemlogo.bmp</Logo>
        <Manufacturer>Lenovo</Manufacturer>
        <HelpCustomized>true</HelpCustomized>
        <RecycleURL>https://www.lenovo.com/recycling</RecycleURL>
        <TradeInURL>https://www.lenovo.com/trade-in-program</TradeInURL>
      </OEMInformation>
    </component>
    <RunSynchronousCommand wcm:action="add">
      <Order>1</Order>
      <Path>reg add HKLM\\SOFTWARE\\Microsoft\\Windows\\CurrentVersion\\OOBE /v BypassNRO /t REG_DWORD /d 1 /f</Path>
    </RunSynchronousCommand>
  </settings>
  .... more settings blocks below ....
It’s not exactly a fast or convenient procedure, but unfortunately the “just unplug network during setup” hack that populates the front couple pages of Google searches on the topic was patched. Anyways, I always disable a bunch of the security theater/DRM and back doors installed by OEMs (in addition to running an overnight RAM test, hence the need to allow third-party/unsigned OS boot), so this was only incrementally more effort on top of what I was already going to do.