The Ware for February 2011 is shown below. Click on the image for a much larger version.
I was loathe to take this one apart, but finally curiosity got the better of me. Enjoy!
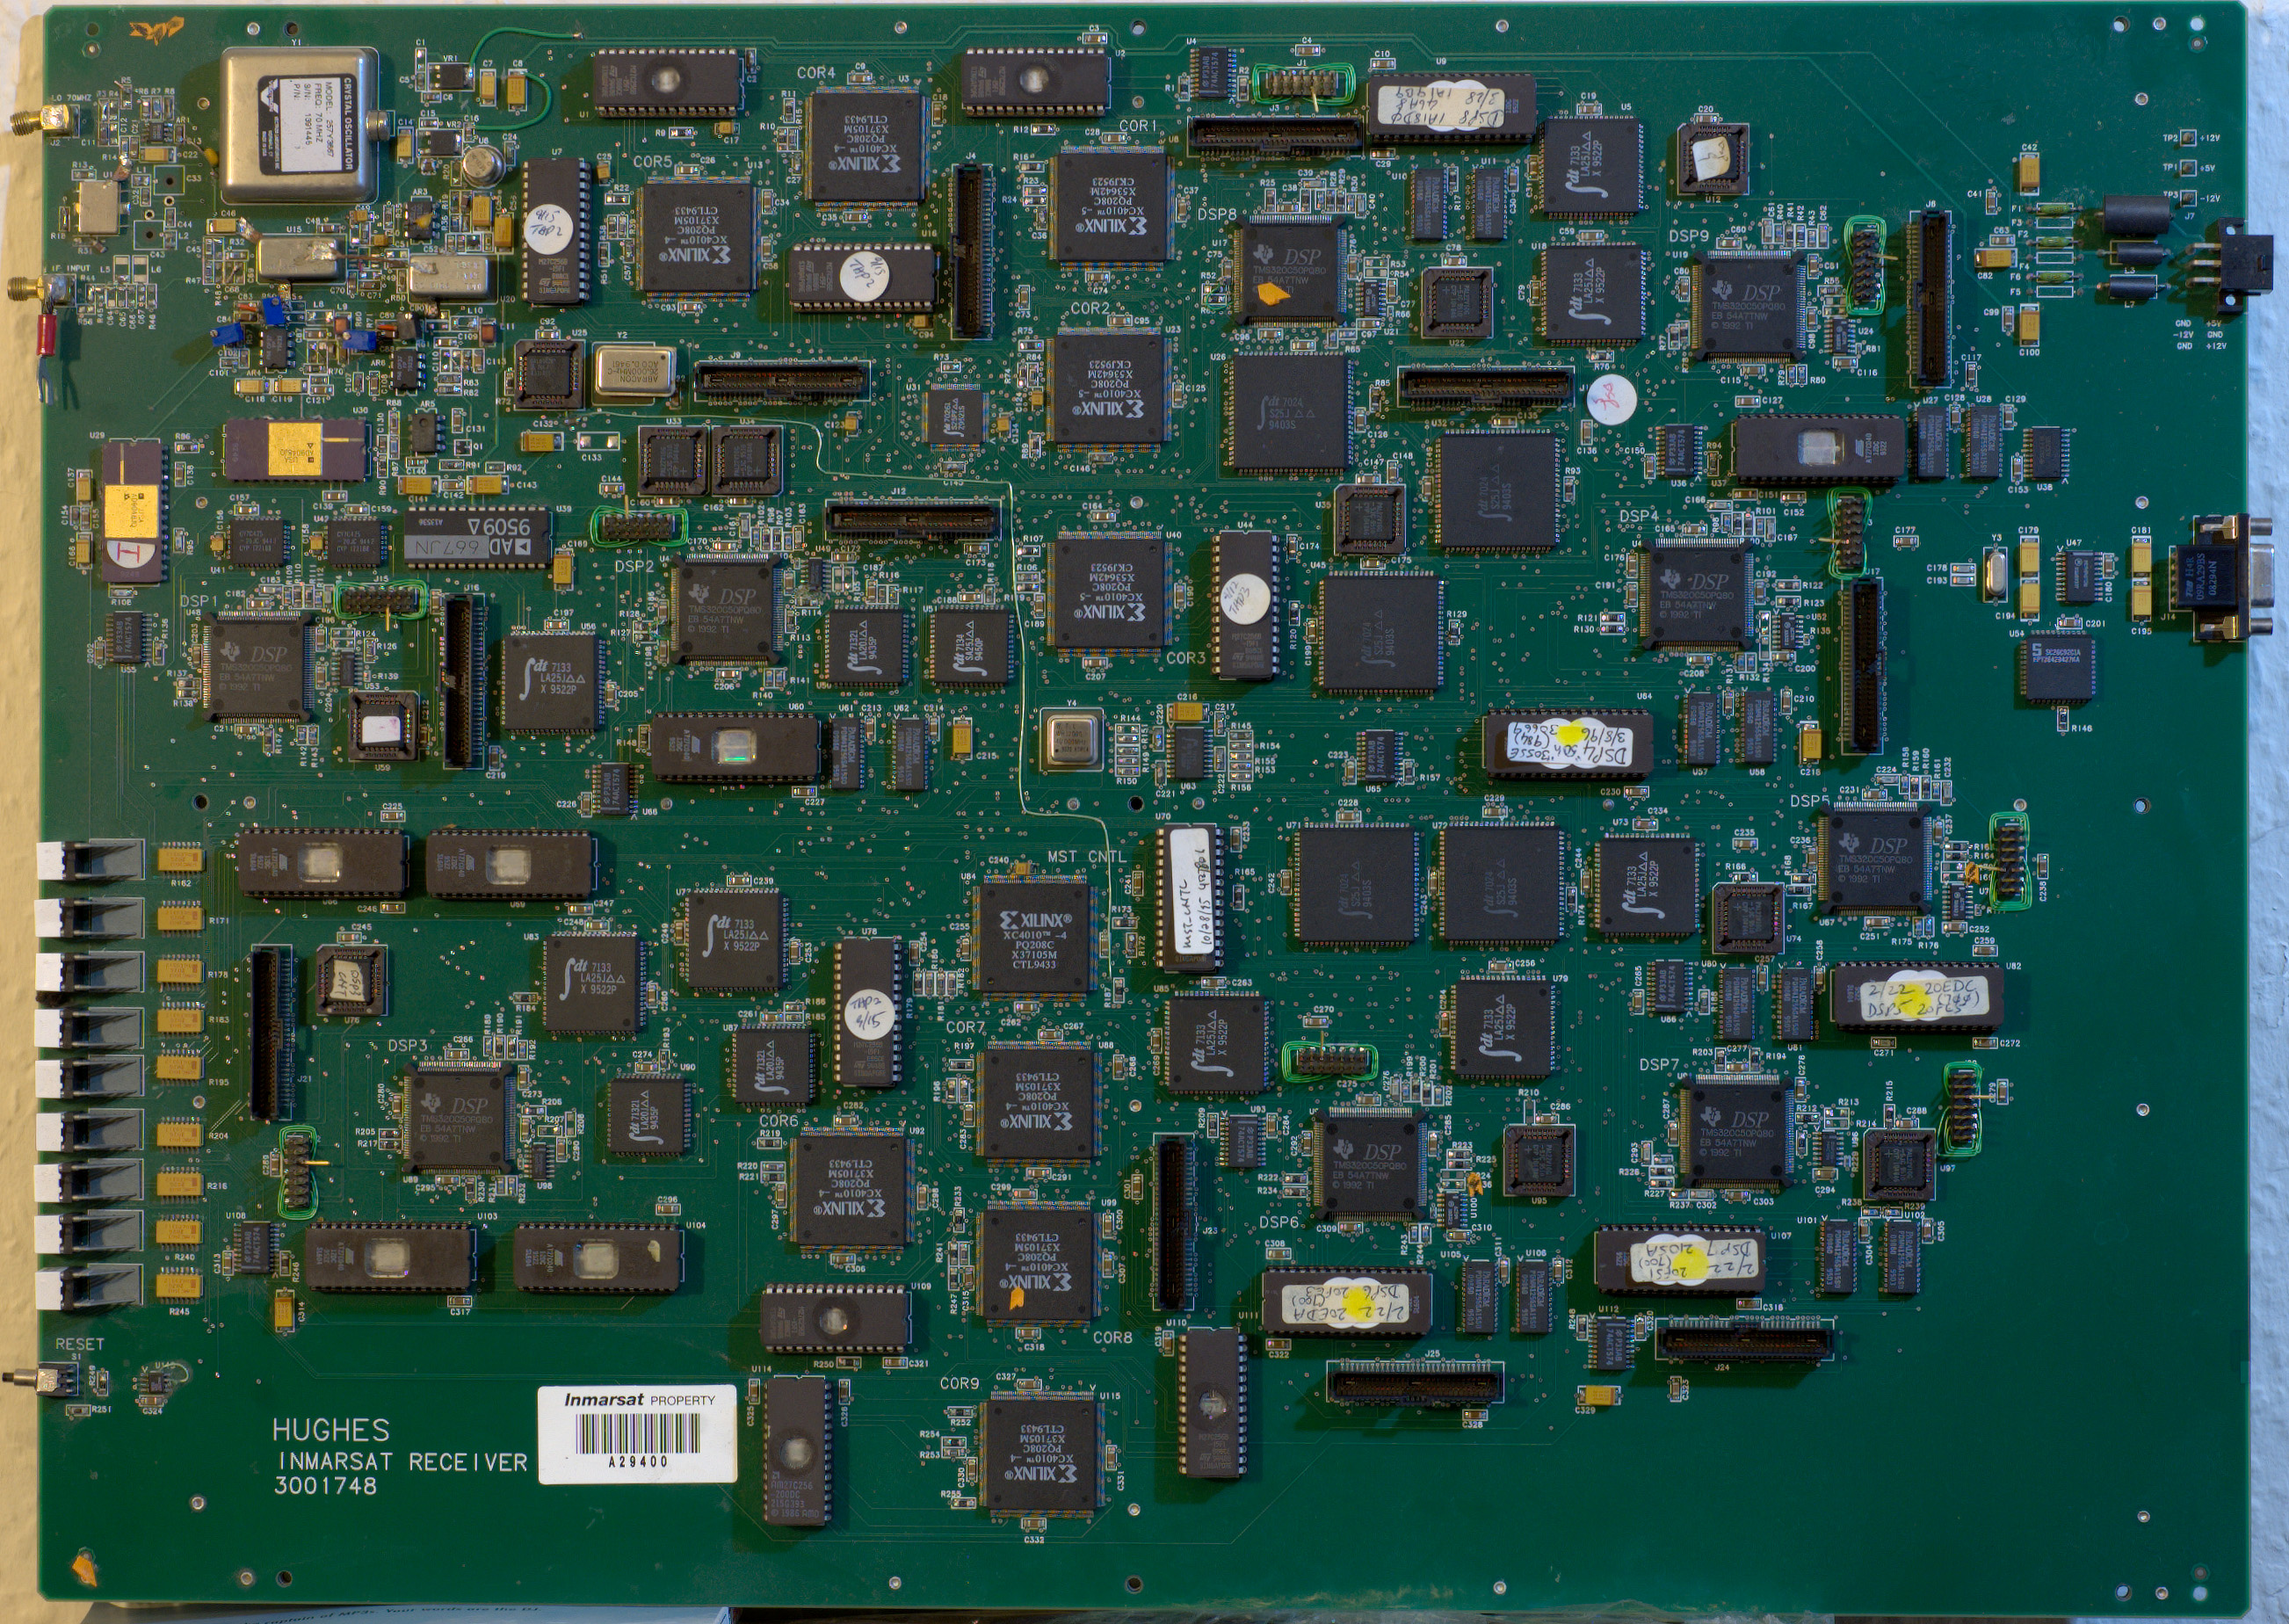
The Ware for February 2011 is shown below. Click on the image for a much larger version.
I was loathe to take this one apart, but finally curiosity got the better of me. Enjoy!
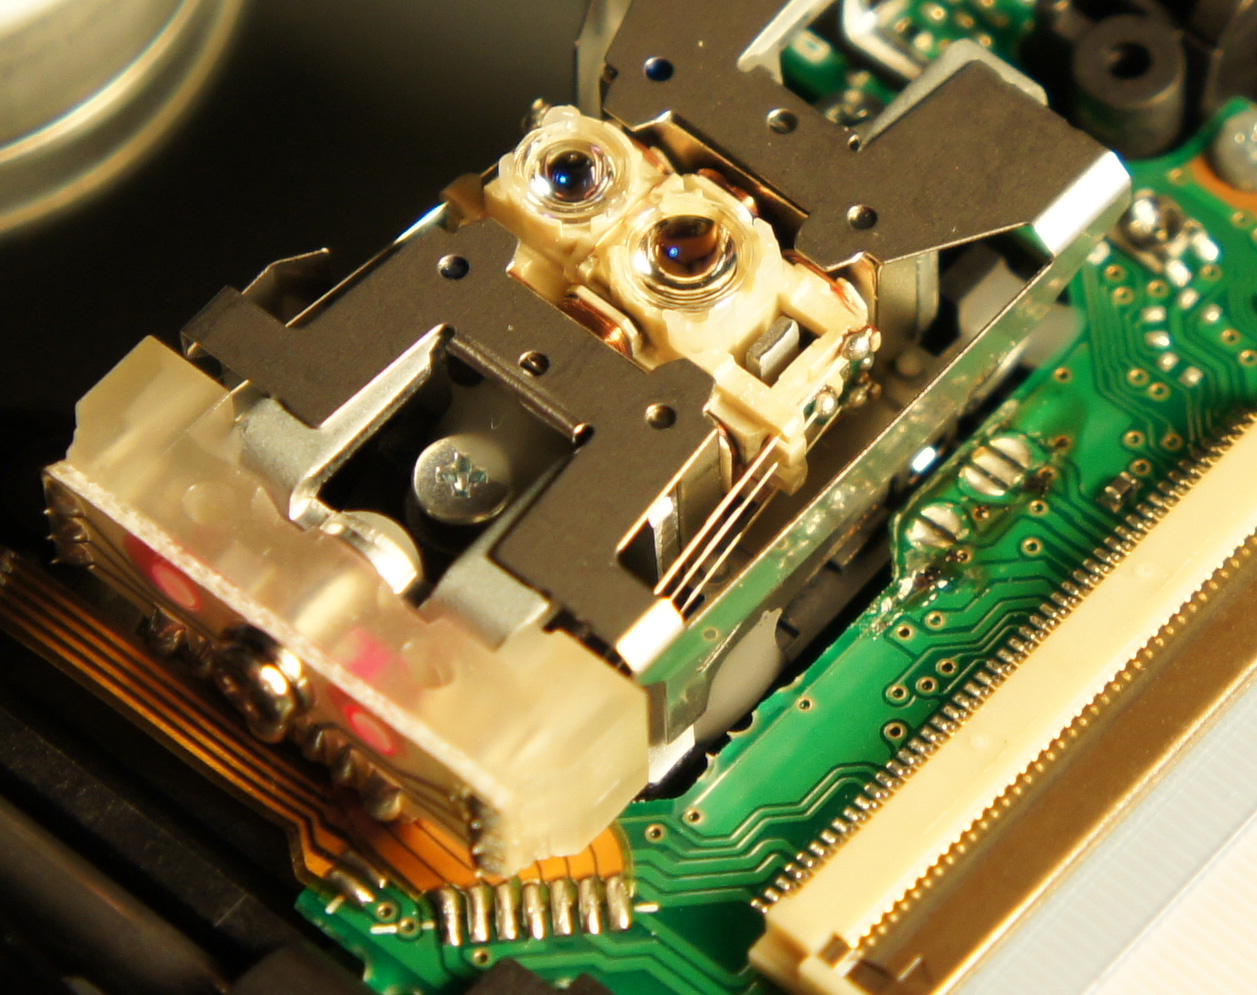
The Ware for January 2011 is a BluRay optical pick-up head. There aren’t too many good photos of these on the web, although I did find a fascinating tear-down of the unit used inside a Sony PS3 from 2007. This particular unit is from a Lite-On OEM module manufactured on October 15 2009, from an HP BD-2000 BluRay player. Below is a photo of the motherboard from the BD-2000 player.

One notable features of the pickup-head is that the entire optics assembly — the piece with two lenses on it molded out of white plastic — “floats” on six whiskers of wire. Three of the whiskers are visible in the front. The entire assembly is buttressed by a set of voice coils that manipulate the assembly’s position by pushing against adjacent fixed permanent magnets. If you take a pair of tweezers and poke the assembly it jiggles freely. The mechanical design ingenuity and manufacturing tolerance that goes into making this is impressive, especially for a low-cost mass-market item.
Back when I designed nanophotonic integrated circuits at Luxtera, we had a problem with aligning single-mode fibers to grating couplers on the surface of a wafer. The single mode fiber alignment problem typically requires expensive manufacturing equipment and highly trained operators to get the laser lined up in three dimensions to within a micron of the optimal launch spot, after which the whole assembly is glued in place. This is a bummer, because if the glue shifts during setting or the operator makes a mistake, a very expensive optical assembly is lost.
Thus, I find it amusing that this low-cost assembly can do that and more, on the fly. According to this white paper, an optics assembly like this can achieve a tracking error of 8 nanometers on an assembly that’s moving around, thus allowing dynamic tracking of the laser spot onto media with a track pitch of 320 nm, much smaller than the micron or so spot size of a single mode fiber.
As for the winner this month, it’s Felix. I actually learned quite a bit reading his entry; for example, I didn’t know that the circle segments on the PCB were for ESD management. Thanks for the detailed lesson. Congrats, email me for your prize!
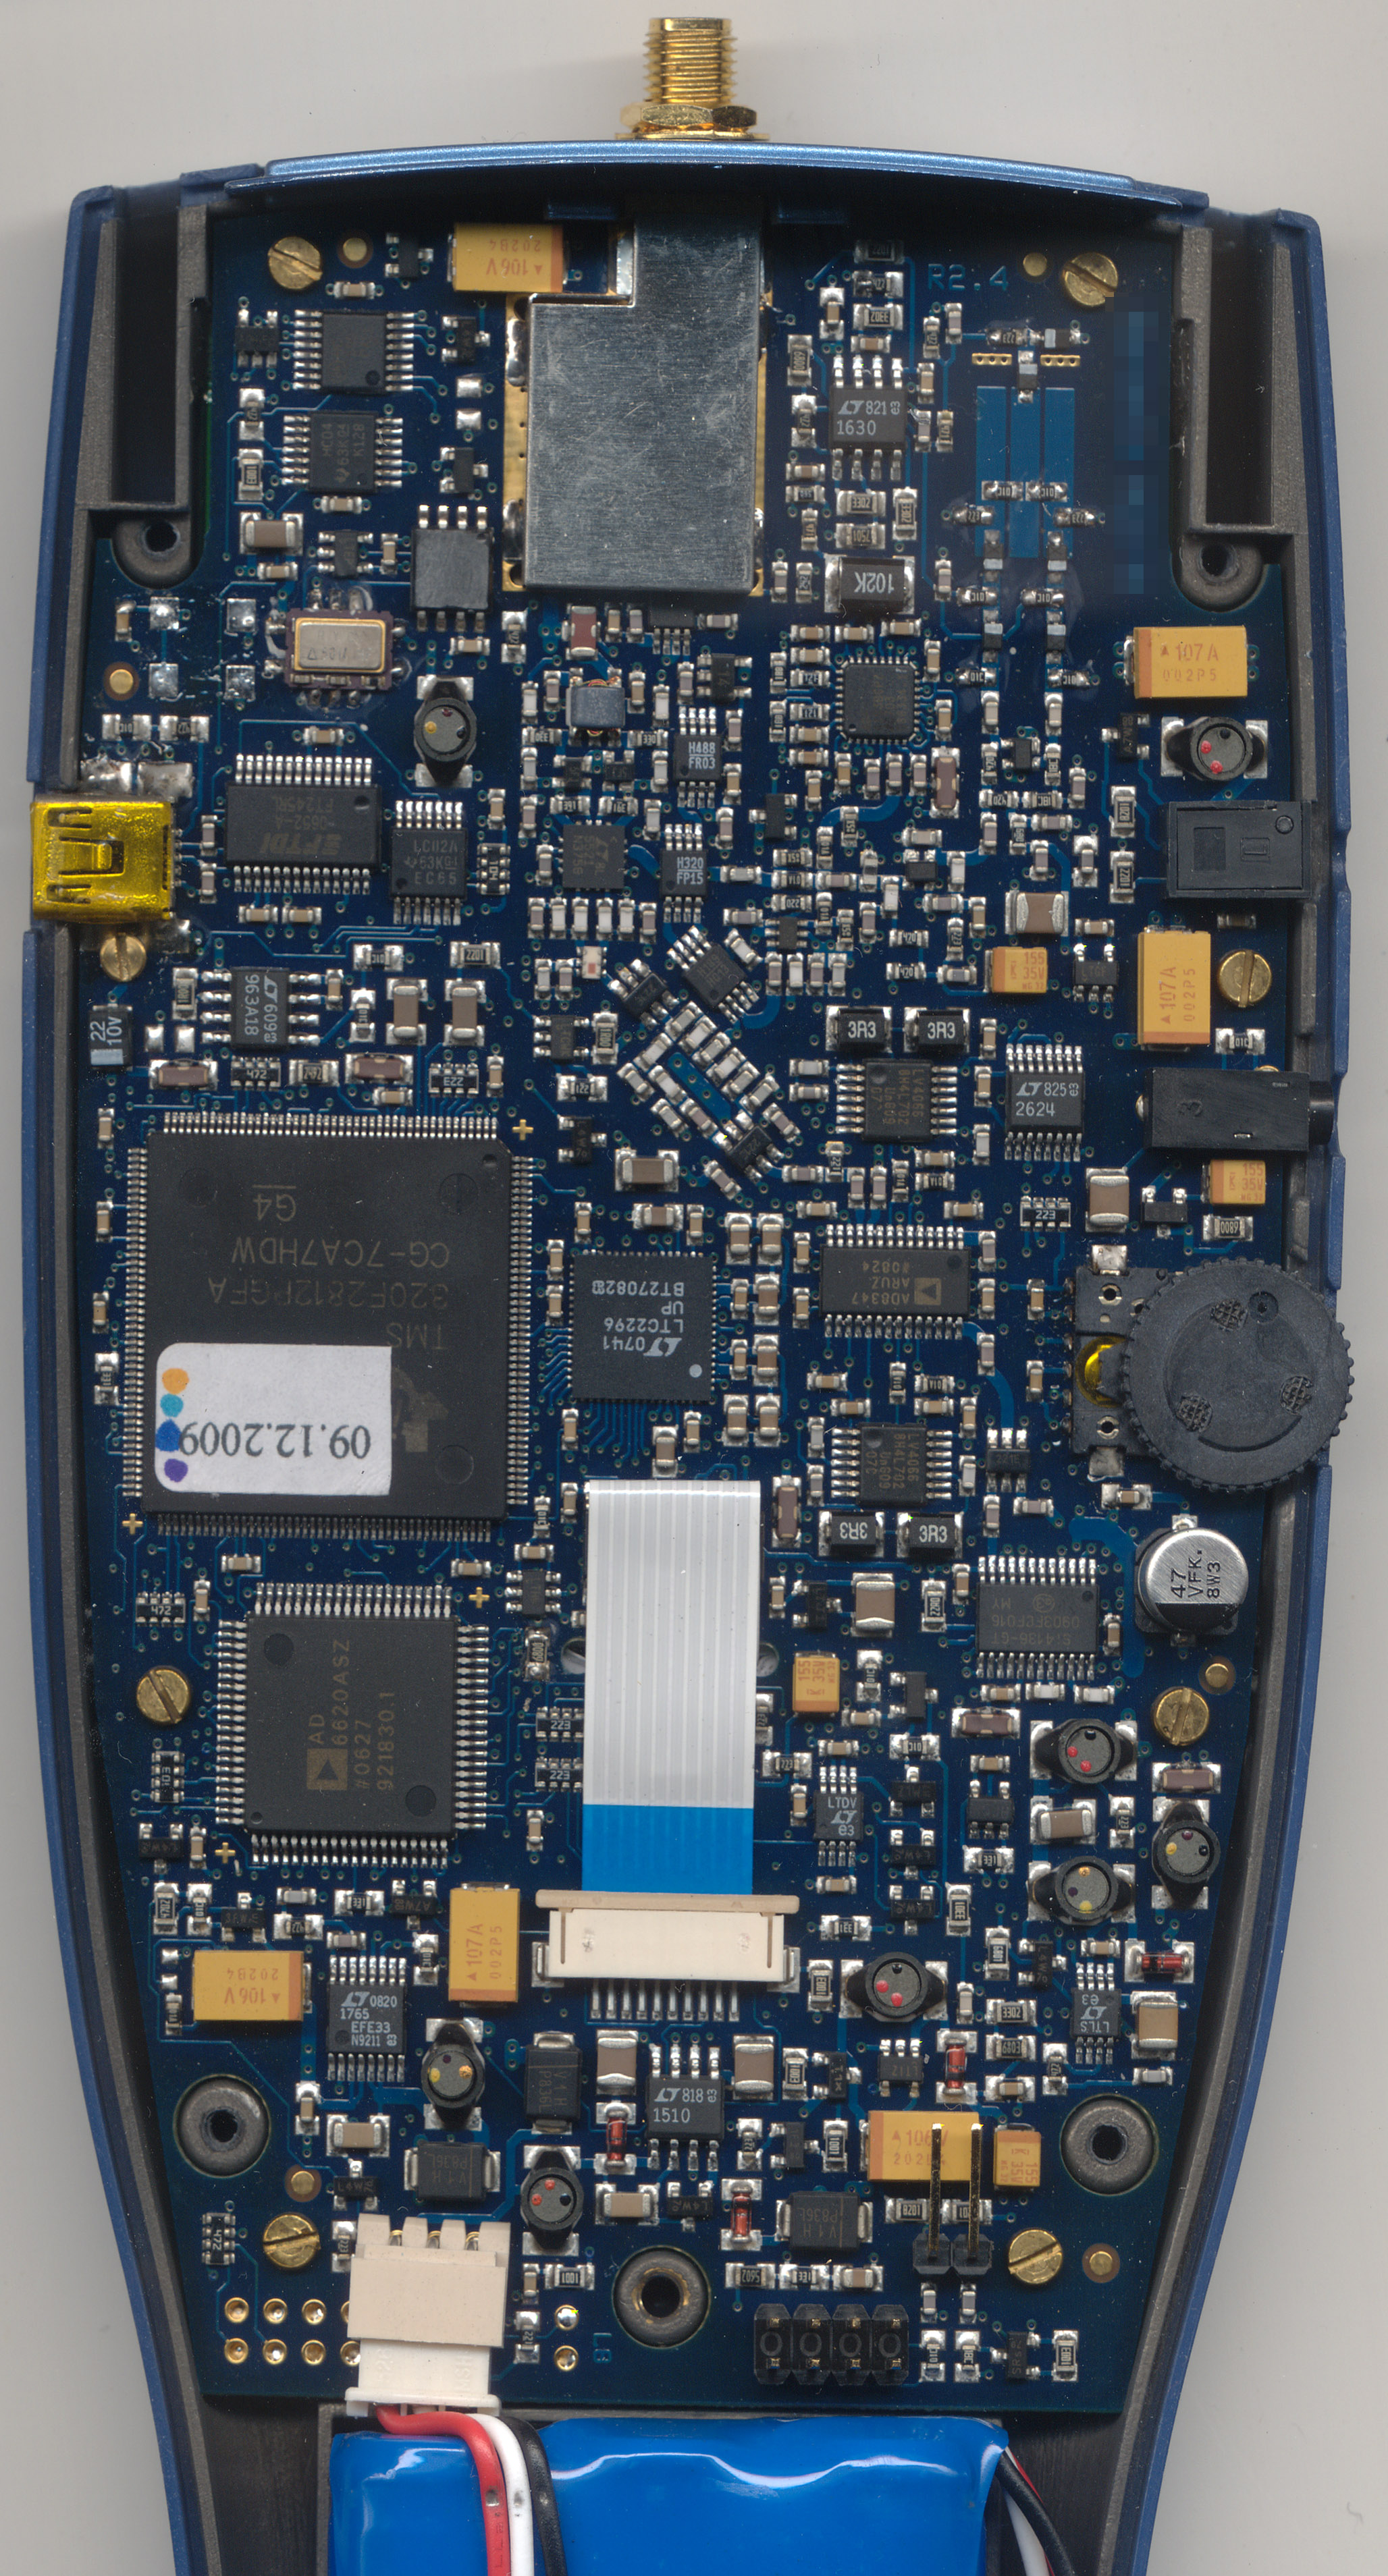
The Ware for January 2011 is shown below. Click on the image for a slightly larger version.
The ware this month is not nearly as hard as last month’s stumper. However, I was surprised by many of the clever features of this ware when I started investigating it in more detail, and thought it was worth sharing a high-res pic of the ware.
The ware for December 2010 is an Inmarsat receiver board. According to the submitter, the ware has notable a history:
This is the Inmarsat receiver used during the round-the-world balloon flight attempts by Steve Fossett and Richard Branson. It was located on the ground along with a whole rack full of related equipment. Some time ago a friend of a friend bought the whole lot on eBay, not really expecting to win. It took up a lot of space in his flat for a while, before being donated to the Dorkbot Alba electronics group. It is currently all taking up space in the Edinburgh Hacklab, if anybody wants it…
Here is the uncensored image of the board, along with a picture of the rack of equipment that went along with it:
For the first time in the history of Name that Ware, I do not have a clear winner. After the 70 MHz IF hint was posted, many homed in on it being a kind of satellite receiver front end. Many of the answers were also very thorough, so much that I couldn’t really declare a winner based solely upon quality and depth of analysis (which is my typical tie-breaking factor). As a result, I’m going to declare the reader who submitted this ware the winner — Martin Ling gets the prize this month for stumping the readers!
With the madness of CES over and the Chinese New Year holiday coming up, I finally found some time to catch up on some back issues of Science. I came across a beautiful diagram of the metabolic pathways of one of the smallest bacteria, Mycoplasma Pneumoniae. It’s part of an article by Eva Yus et al (Science 326, 1263-1271 (2009)).

Looking at this metabolic pathway reminds me of when I was less than a decade old, staring at the schematic of an Apple II. Back then, I knew that this fascinatingly complex mass of lines was a map to this machine in front of me, but I didn’t know quite enough to do anything with the map. However, the key was that a map existed, so despite its imposing appearance it represented a hope for fully unraveling such complexities.

The analogy isn’t quite precise, but at a 10,000 foot level the complexity and detail of the two diagrams feels similar. The metabolic schematic is detailed enough for me to trace a path from glucose to ethanol, and the Apple II schematic is detailed enough for me to trace a path from the CPU to the speaker.
And just as a biologist wouldn’t make much of a box with 74LS74 attached to it, an electrical engineer wouldn’t make much of a box with ADH inside it (fwiw, a 74LS74 (datasheet) is a synchronous storage device with two storage elements, and ADH is alcohol deydrogenase, an enzyme coded by gene MPN564 (sequence data) that can turn acetaldehyde into ethanol).
In the supplemental material, the authors of the paper included what reads like a BOM (bill of materials) for M. pneumoniae. Every enzyme (pentagonal boxes in the schematic) is listed in the BOM with its functional description, along with a reference that allows you to find its sequence source code. At the very end is a table of uncharacterized genes — those who do a bit of reverse engineering would be very familiar with such tables of “hmm I sort of know what it should do but I’m not sure yet” parts or function calls.