The Ware for June 2014 is shown below.
This is a reader-submitted ware, but the submitter requested to remain anonymous. Thanks, though, you know who you are!
The Ware for June 2014 is shown below.
This is a reader-submitted ware, but the submitter requested to remain anonymous. Thanks, though, you know who you are!
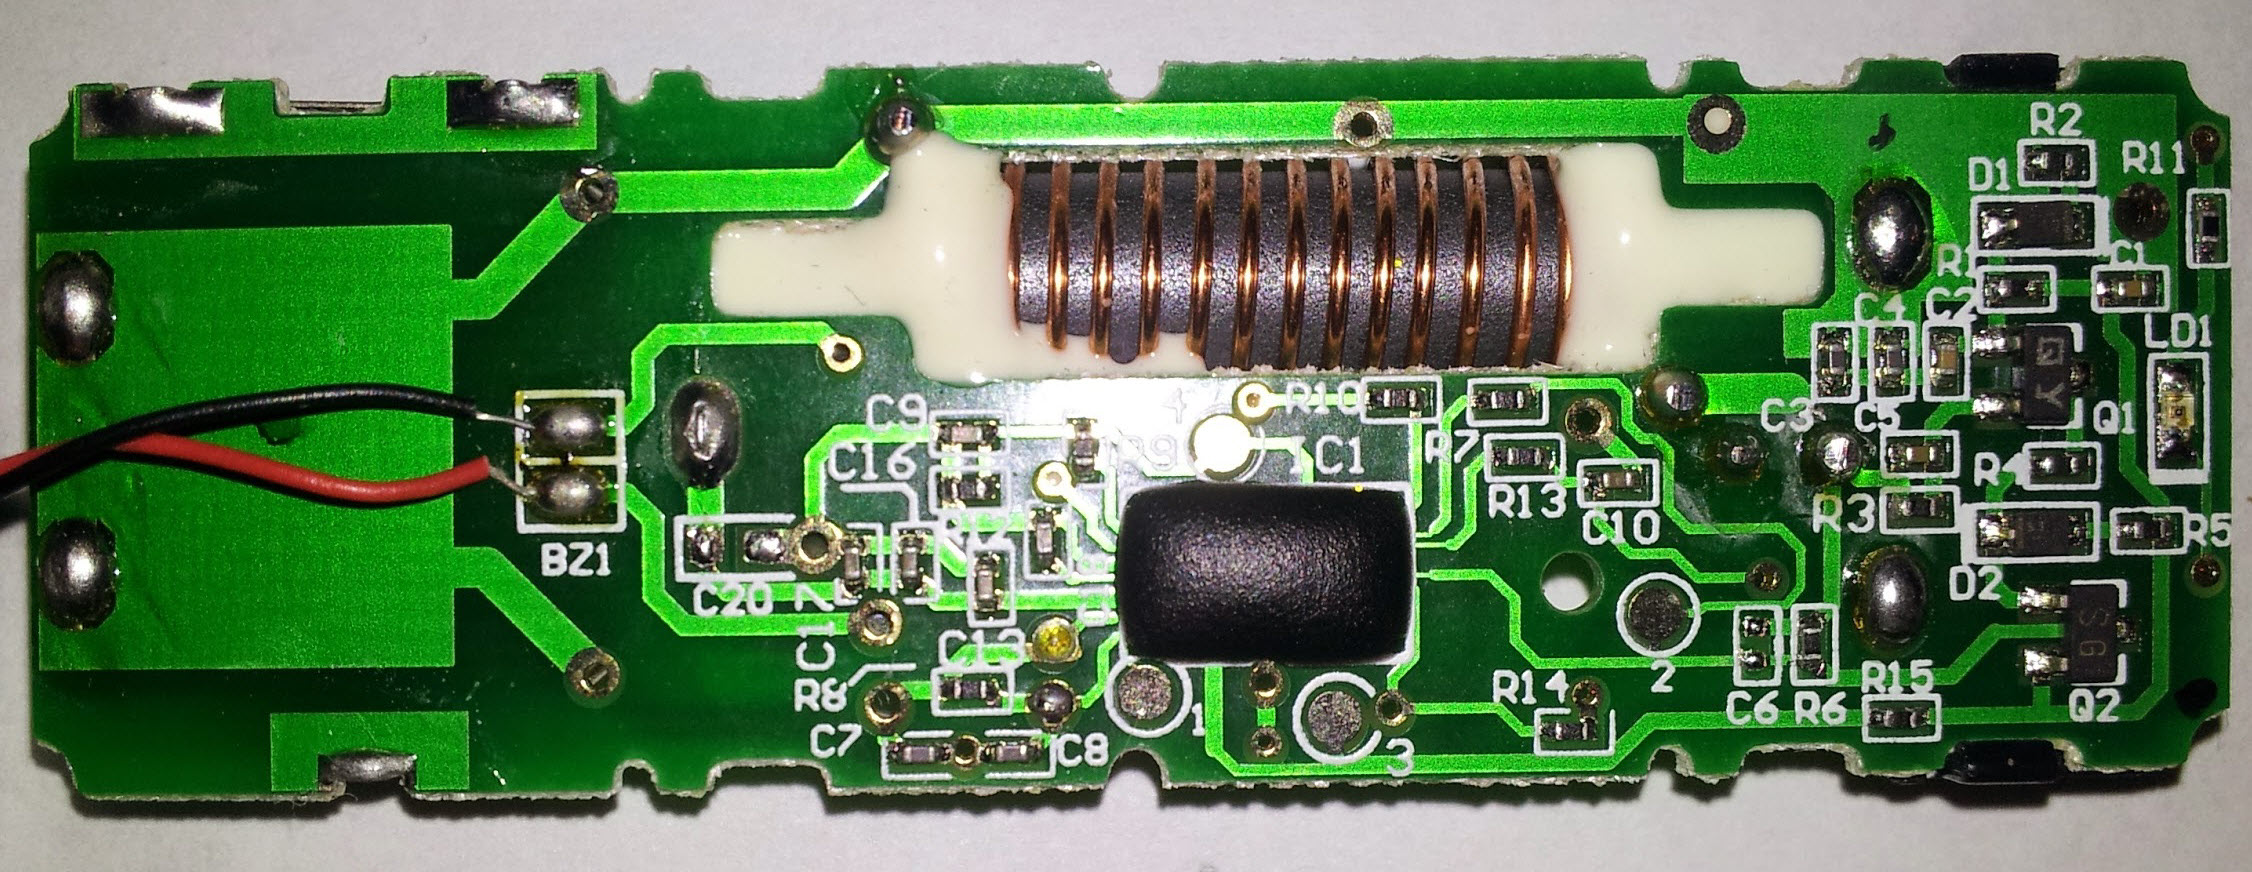
The Ware for May 2014 was a “screamer tag” from Checkpoint Systems. The board bears the silkscreen markings “SC-TG001 Ver05”, and was made by the Kojin Company for use in Japan. Presumably, this tag is part of an anti-theft system that activates an alarm when connectivity between a pair of contacts, visible in the photo, is broken; or if a signal is received (or lost) via RF.
A lot of good and very close guesses this time, but I’ll have to hand the prize to Hugo for naming the function quite explicitly. Congrats, email me for your prize!
So this past week has been quite a whirlwind — we wrapped up the Novena campaign and smashed all our stretch goals, concluding with over $700k raised, and I got my hair cut in a bar at midnight by none other than the skilled hands of Lenore of Evil Mad Scientist Laboratories (I blame Jake! :). It was an exhilarating week; xobs and I are really grateful for the outpouring of support and we’re looking forward to working with the community to build an open hardware ecosystem that can grow for years to come.
On my way back home to Singapore, I stopped by Dongguan to have a visit with my supply chain partners to hammer out production plans for Novena. Unfortunately, as I was getting out of the taxi at the Futian border checkpoint going into China, I dropped my phone on the sidewalk and shattered its screen.
There is no better place in the world to break your phone’s screen than the border crossing into Shenzhen. Within an hour of dropping the phone, I had a new screen installed by skilled hands in Hua Qiang Bei, for a price of $25.
Originally, I thought I would replace the screen myself — on my broken phone, I hastily visited iFixit for details on the procedure to replace the screen, and then booked it over to Hua Qiang Bei to purchase the replacement parts and tools I would need. The stall I visited quoted me about US$120 for a new screen, but then the lady grabbed my phone out of my hands, and launched a built in self test program on the phone by dialing *#0*# into the phone dialer UI.
She confirmed that there were no bad pixels on my OLED display and that the digitizer was still functional, but just cracked. She then offered to buy my broken OLED+digitizer assembly off of me, but only if they did the work to replace my screen. I said it would be fine as long as I could watch them do the job, to make sure they aren’t swapping out any other parts on me.
They had no problem with that, of course — so my phone came apart, had the old broken OLED+digitizer assembly separated, adhesive stripped from the phone body, replaced with a proper new film of adhesive, a “new” (presumably refurbished) OLED+digitizer fitted and re-assembled in 20 minutes. The whole service including parts and labor came out to $25. I kept on thinking “man I should take pictures of this” but unfortunately the device I would use to take said pictures was in pieces in front of me. But, I’ll hint that the process involved a hair dryer (used as a heat gun), copious amounts of contact cleaner (used to soften the adhesive on the OLED+digitizer module), and a very long thumbnail (in lieu of a spudger/guitar pick).
This is the power of recycling and repair — instead of paying $120 for a screen and throwing away what is largely a functional piece of electronics, I just had to pay for the cost of just replacing the broken glass itself. I had originally assumed that the glass on the digitizer is inseparable from the OLED, but apparently those clever folks in Hua Qiang Bei have figured out an efficient method to recycle these parts. After all, the bulk of the assembly’s cost is in the OLED display, and the touchscreen sensor electronics (which are also grafted onto the module) are also undamaged by the fall. Why waste perfectly good parts, anyways?
And so, my phone had a broken screen for all of an hour, and it was fixed for less than the cost of shipping spare parts to Singapore. There is no better place to break your phone than in Shenzhen!
The Ware for April 2014 is a Propeller II from Parallax. Kudos to David for nailing it; email me for your prize!